Please Note: This article is written for users of the following Microsoft Word versions: 97, 2000, 2002, and 2003. If you are using a later version (Word 2007 or later), this tip may not work for you. For a version of this tip written specifically for later versions of Word, click here: Shading Table Rows.
In Excel it is possible to use conditional formatting to shade every other row (or every nth row) of a data table. You may want to accomplish the same task in Word, and the program provides several approaches you can take.
One approach is to use the AutoFormat capabilities of Word on your table. Follow these steps:
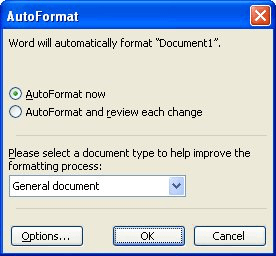
Figure 1. The AutoFormat dialog box.
Many of the AutoFormats provided for tables are "smart," meaning that they can adjust row shading even if you add new rows to the table. How is this done? Glad you asked; that leads to the second method of shading table rows—table styles.
Styles have been available in Word for years and years. One of the relatively recent additions to Word's style capabilities is styles for tables. You can define a table style that automatically applies shading to either the even or odd rows in a table. (This is how the Table AutoFormats do it.) Follow these steps:
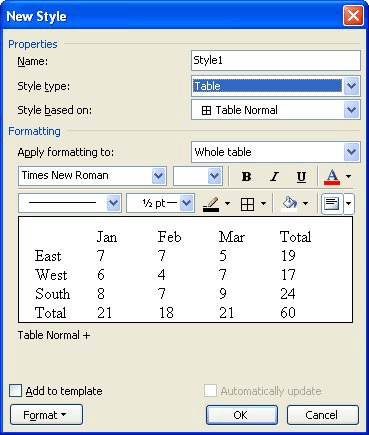
Figure 2. The New Style dialog box.
You've now created a shading style for either odd or even rows. You can apply this style to the table, as desired. The formatting automatically adjusts as you change the number of rows in the table.
The solutions described so far work great if you want to apply formatting to every other row in a table, and provided you are using a version of Word that supports table formatting. They don't work so well if you want the formatting applied to every third, fourth, or fifth row or if you are using an older version of Word that doesn't include table formatting. In these instances it may be best to use a macro to do your formatting. The following is a good example of a macro that can apply shading to every third row in a table:
Sub ShadeRows()
    Dim iRow As Integer
    Dim iHeads As Integer
    Dim iRowTtl As Integer

    If Selection.Information(wdWithInTable) = True Then
        iHeads = InputBox(prompt:="Number of heading rows?", _
          Title:="Headings", Default:="1")

        iRowTtl = Selection.Tables(1).Rows.Count - iHeads
        For iRow = 1 To iRowTtl
            If iRow Mod 3 = 0 Then
                Selection.Tables(1).Rows(iRow + iHeads).Shading.Texture _
                  = wdTexture20Percent
            Else
                Selection.Tables(1).Rows(iRow + iHeads).Shading.Texture _
                  = wdTextureNone
            End If
        Next iRow
    End If
End Sub
The macro asks how many header rows are in the table, and then adjusts the rows to which it applies shading. If the insertion point is not within a table when the macro is run, then nothing happens. You can also change the frequency of shading (for instance, from every third row to every fourth) by changing the Mod formula. Simply change the single line, in this manner:
If iRow Mod 4 = 0 Then
You can also change the amount of shading by changing the wdTexture20Percent constant to another, such as wdTexture5Percent, wdTexture10Percent, wdTexture25Percent, etc.
You should also understand that if you run the macro on a table where cells have been merged vertically, you may get unexpected results, if any. If you change the number of rows in a table, then you will need to run the macro again to reapply the shading.
Note:
WordTips is your source for cost-effective Microsoft Word training. (Microsoft Word is the most popular word processing software in the world.) This tip (5814) applies to Microsoft Word 97, 2000, 2002, and 2003. You can find a version of this tip for the ribbon interface of Word (Word 2007 and later) here: Shading Table Rows.

Learning Made Easy! Quickly teach yourself how to format, publish, and share your content using Word 2021 or Microsoft 365. With Step by Step, you set the pace, building and practicing the skills you need, just when you need them! Check out Microsoft Word Step by Step today!
Formatting tables can be very time consuming. When you get a document from another person, you can spend a lot of time ...
Discover MoreHow to make the border on the last row on a page look right.
Discover MoreWhen you insert a table into your document, it uses a standard-weight line around each cell in the table. If you want to ...
Discover MoreFREE SERVICE: Get tips like this every week in WordTips, a free productivity newsletter. Enter your address and click "Subscribe."
There are currently no comments for this tip. (Be the first to leave your comment—just use the simple form above!)
Got a version of Word that uses the menu interface (Word 97, Word 2000, Word 2002, or Word 2003)? This site is for you! If you use a later version of Word, visit our WordTips site focusing on the ribbon interface.
Visit the WordTips channel on YouTube

FREE SERVICE: Get tips like this every week in WordTips, a free productivity newsletter. Enter your address and click "Subscribe."
Copyright © 2026 Sharon Parq Associates, Inc.
 Please Note:
This article is written for users of the following Microsoft Word versions: 97, 2000, 2002, and 2003. If you are using a later version (Word 2007 or later), this tip may not work for you. For a version of this tip written specifically for later versions of Word, click here:
Please Note:
This article is written for users of the following Microsoft Word versions: 97, 2000, 2002, and 2003. If you are using a later version (Word 2007 or later), this tip may not work for you. For a version of this tip written specifically for later versions of Word, click here:
Comments