Please Note: This article is written for users of the following Microsoft Word versions: 97, 2000, 2002, and 2003. If you are using a later version (Word 2007 or later), this tip may not work for you. For a version of this tip written specifically for later versions of Word, click here: Default Envelope Margins.
Word does not allow you to easily change the default positions at which the return address and main address are printed on an envelope. There are several ways around this problem, each of which exemplifies the flexible nature of Word to accomplish a task.
It seems that envelope settings are stored as a part of your document, and therefore can be stored in a template. If you only print one size of envelope, the easiest way to change the default printing position for your envelopes is to follow these steps:
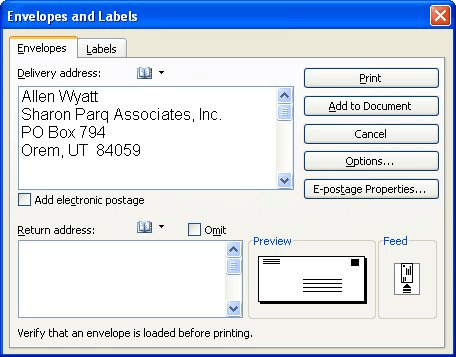
Figure 1. The Envelopes tab of the Envelopes and Labels dialog box.
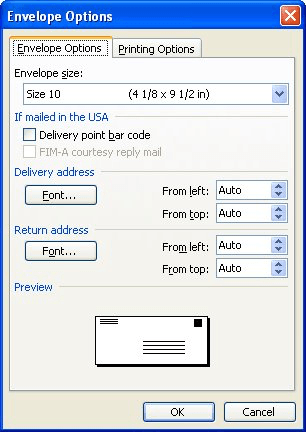
Figure 2. The Envelope Options dialog box.
Now, the next time you use a document based on the Normal style, the envelope settings will reflect those you created in these steps.
You can also use a solution that uses a macro to create your envelopes. For instance, you can start with a new, blank document, and create an envelope that is just the way you want it to be. Add this envelope to the blank document, and then save it as a template using a descriptive name (such as Envelope.dot). Then, create the following macro and assign it to a Toolbar button:
Sub DoEnv()
    Documents.Add Template:="Envelope", NewTemplate:=False
    Selection.EndKey Unit:=wdStory
    Selection.MoveLeft Unit:=wdCharacter, Count:=2
    Selection.PasteSpecial DataType:=wdPasteText
    Application.PrintOut Range:=wdPrintCurrentPage
    ActiveWindow.Close (False)
End Sub
To print an envelope, highlight the address in a letter then click on the Toolbar button with which this macro is associated. The macro will copy the address to the Clipboard, paste it at the proper place in a new document based on the Envelope template, print the envelope, and then close the envelope document without saving it.
A different approach is to use a macro to set the standard (meaning, those you want to use most often) envelope settings for you. The following macro will do just that:
Sub ToolsEnvelopesAndLabels()
    Dim EnvThere As Integer
    Dim recipient As String
    EnvThere = False
    recipient = Selection.Text
    On Error Resume Next
    If IsError(ActiveDocument.Envelope.Address) Then
        ActiveDocument.Envelope.Insert
        EnvThere = True
    End If
    With ActiveDocument.Envelope
        .DefaultFaceUp = True
        .DefaultOrientation = wdCenterClockwise
        .DefaultHeight = CentimetersToPoints(11)
        .DefaultWidth = CentimetersToPoints(22)
        .AddressFromLeft = CentimetersToPoints(5)
        .AddressFromTop = CentimetersToPoints(5)
        .ReturnAddressFromLeft = CentimetersToPoints(2)
        .ReturnAddressFromTop = CentimetersToPoints(2)
    End With
    If EnvThere Then
        ActiveDocument.Sections(1).Range.Delete
    Else
        ActiveDocument.Envelope.UpdateDocument
    End If
    With Application.Dialogs(wdDialogToolsCreateEnvelope)
        .ExtractAddress = True
        If .AddrText = "" Then
            .AddrText = recipient
        End If
        .Show
    End With
End Sub
To use this macro, first select the address you want used on the envelope. The macro grabs the current selection and uses it as the envelope address if no other address has already been defined. Next the IsError function determines if an envelope already exists; if one doesn't, a new one is inserted and EnvThere is set to tell us to delete it once we have changed the default properties. Once an envelope exists in the document we then change the default properties of the envelope. This is done in the With ActiveDocument.Envelope section. You can customize these properties as needed or simply omit them. (This example uses the CentimetersToPoints function to set the values; you could use other functions such as InchesToPoints, if desired.) The macro ends up by displaying the Envelope and Labels dialog box so you can make any last minute changes before printing or creating your envelope.
Note:
WordTips is your source for cost-effective Microsoft Word training. (Microsoft Word is the most popular word processing software in the world.) This tip (1824) applies to Microsoft Word 97, 2000, 2002, and 2003. You can find a version of this tip for the ribbon interface of Word (Word 2007 and later) here: Default Envelope Margins.

Create Custom Apps with VBA! Discover how to extend the capabilities of Office 365 applications with VBA programming. Written in clear terms and understandable language, the book includes systematic tutorials and contains both intermediate and advanced content for experienced VB developers. Designed to be comprehensive, the book addresses not just one Office application, but the entire Office suite. Check out Mastering VBA for Microsoft Office 365 today!
Need to customize the way that Word prints envelopes? There are a couple of approaches you can use, as discussed in this tip.
Discover MoreWhen you try to print an envelope in Word, it can be vexing if the envelope always goes through the printer and remains ...
Discover MoreGot a reply envelope you want to create? Why not put a placeholder for the stamp on the envelope? It's easy to do if you ...
Discover MoreFREE SERVICE: Get tips like this every week in WordTips, a free productivity newsletter. Enter your address and click "Subscribe."
There are currently no comments for this tip. (Be the first to leave your comment—just use the simple form above!)
Got a version of Word that uses the menu interface (Word 97, Word 2000, Word 2002, or Word 2003)? This site is for you! If you use a later version of Word, visit our WordTips site focusing on the ribbon interface.
Visit the WordTips channel on YouTube

FREE SERVICE: Get tips like this every week in WordTips, a free productivity newsletter. Enter your address and click "Subscribe."
Copyright © 2026 Sharon Parq Associates, Inc.
 Please Note:
This article is written for users of the following Microsoft Word versions: 97, 2000, 2002, and 2003. If you are using a later version (Word 2007 or later), this tip may not work for you. For a version of this tip written specifically for later versions of Word, click here:
Please Note:
This article is written for users of the following Microsoft Word versions: 97, 2000, 2002, and 2003. If you are using a later version (Word 2007 or later), this tip may not work for you. For a version of this tip written specifically for later versions of Word, click here:
Comments