Please Note: This article is written for users of the following Microsoft Word versions: 97, 2000, 2002, and 2003. If you are using a later version (Word 2007 or later), this tip may not work for you. For a version of this tip written specifically for later versions of Word, click here: Protecting Parts of a Document.
Word allows you to protect parts of a document so that they cannot be changed. This is done through Word's implementation of its forms feature. The idea behind forms is that you can specify the information to be entered in a form, using special controls, and then you protect the form so that you can only enter data by using those controls; all other information in the protected portion of the form cannot be changed. If you didn't define any controls for the form, then all the information still remains protected, and you end up with a document that cannot be changed.
When you protect your document, you can also specify that only specific sections of the document be protected. Sections, in Word, are defined by the presence of section breaks. You insert a section break by using the Insert | Break command. Once your document is divided into sections, you can protect a section by following these steps:
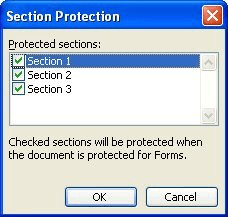
Figure 1. The Section Protection dialog box.
At this point you cannot change anything in the document sections you specified in step 4, unless there were forms controls in that section.
Notice that protection is done in Word on a section-by-section basis. (If there is only one section in the document, then the whole document is protected.) This means that you cannot protect other objects, such as text boxes or table cells. There is a way, however, that you can protect an entire row in a table. All you need to do is insert a continuous section break at the beginning of the row you want to protect, and then insert another continuous section break at the beginning of the row following the one you want to protect. You can then follow the above steps to protect the section you just created—the one containing a single table row.
You can find more information about creating forms at this Word MVP Web page:
http://wordmvp.com/FAQs/Customization/FillinTheBlanks.htm
Pay particular attention to the links to the tutorials written by Dian Chapman; they provide quite a bit of detailed information about forms.
WordTips is your source for cost-effective Microsoft Word training. (Microsoft Word is the most popular word processing software in the world.) This tip (1685) applies to Microsoft Word 97, 2000, 2002, and 2003. You can find a version of this tip for the ribbon interface of Word (Word 2007 and later) here: Protecting Parts of a Document.

Do More in Less Time! An easy-to-understand guide to the more advanced features available in the Microsoft 365 version of Word. Enhance the quality of your documents and boost productivity in any field with this in-depth resource. Complete your Word-related tasks more efficiently as you unlock lesser-known tools and learn to quickly access the features you need. Check out Microsoft 365 Word For Professionals For Dummies today!
One of the controls you can add to a Word form is a drop-down form field. This field is similar to drop-down lists used ...
Discover MoreWhen you create a form you need to use special form fields. If you want to limit what users can enter in a form field, ...
Discover MoreIf you have ever created several documents that contain the same basic information with only a few minor differences, ...
Discover MoreFREE SERVICE: Get tips like this every week in WordTips, a free productivity newsletter. Enter your address and click "Subscribe."
There are currently no comments for this tip. (Be the first to leave your comment—just use the simple form above!)
Got a version of Word that uses the menu interface (Word 97, Word 2000, Word 2002, or Word 2003)? This site is for you! If you use a later version of Word, visit our WordTips site focusing on the ribbon interface.
Visit the WordTips channel on YouTube

FREE SERVICE: Get tips like this every week in WordTips, a free productivity newsletter. Enter your address and click "Subscribe."
Copyright © 2026 Sharon Parq Associates, Inc.
 Please Note:
This article is written for users of the following Microsoft Word versions: 97, 2000, 2002, and 2003. If you are using a later version (Word 2007 or later), this tip may not work for you. For a version of this tip written specifically for later versions of Word, click here:
Please Note:
This article is written for users of the following Microsoft Word versions: 97, 2000, 2002, and 2003. If you are using a later version (Word 2007 or later), this tip may not work for you. For a version of this tip written specifically for later versions of Word, click here:
Comments