Word is very flexible. You can customize your working environment to your heart's content. You can change menus, the toolbar, viewing and printing options, and many more variables. There may come a day, however, when you want to reset the Word toolbars to their default condition. When you do this, all the toolbar buttons and their order will be set to the same condition they were when you first installed Word. If you want to reset a toolbar, follow these steps:
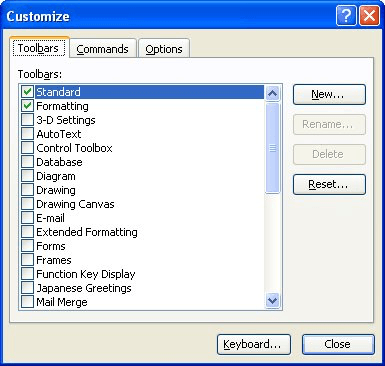
Figure 1. The Toolbars tab of the Customize dialog box.
WordTips is your source for cost-effective Microsoft Word training. (Microsoft Word is the most popular word processing software in the world.) This tip (1127) applies to Microsoft Word 97, 2000, 2002, and 2003.

Discover the Power of Microsoft Office This beginner-friendly guide reveals the expert tips and strategies you need to skyrocket your productivity and use Office 365 like a pro. Mastering software like Word, Excel, and PowerPoint is essential to be more efficient and advance your career. Simple lessons guide you through every step, providing the knowledge you need to get started. Check out Microsoft Office 365 For Beginners today!
If you make changes to a toolbar in Word, you expect those changes to be available the next time you start the program. ...
Discover MoreNeed to remove a toolbar button, but don't want to go through the hassle of displaying the Configure dialog box? You can ...
Discover MoreWord is quite flexible in how you can configure the user interface. This tip explains how you can customize a toolbar so ...
Discover MoreFREE SERVICE: Get tips like this every week in WordTips, a free productivity newsletter. Enter your address and click "Subscribe."
There are currently no comments for this tip. (Be the first to leave your comment—just use the simple form above!)
Got a version of Word that uses the menu interface (Word 97, Word 2000, Word 2002, or Word 2003)? This site is for you! If you use a later version of Word, visit our WordTips site focusing on the ribbon interface.
Visit the WordTips channel on YouTube

FREE SERVICE: Get tips like this every week in WordTips, a free productivity newsletter. Enter your address and click "Subscribe."
Copyright © 2026 Sharon Parq Associates, Inc.
Comments