When creating a document that includes graphics and/or AutoShapes, you can spend quite a bit of time formatting. Getting graphics and their surrounding text to appear "just right" can be very time consuming. After a couple of formatting sessions, you may long for a way to set some sort of defaults that Word will automatically apply to all your graphics and AutoShapes.
When it comes to graphics in general, there is no way to set any formatting defaults. The one exception is that if you are using Word 2002 or Word 2003 you can set the default wrapping style by following these steps:
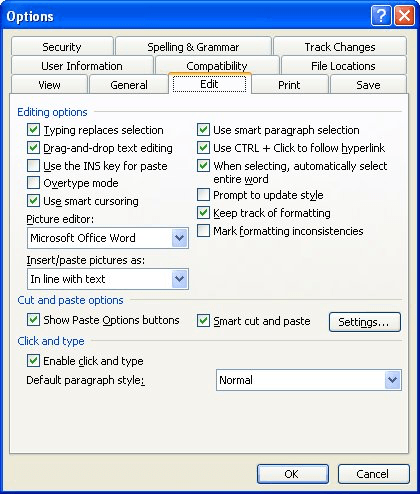
Figure 1. The Edit tab of the Options dialog box.
Beyond this (or if you are using earlier versions of Word) you can record a macro that applies your common graphic formatting options. This macro could then be used to format other graphics after you insert them in your document.
You have more options when it comes to AutoShapes. Word allows you to define default formatting settings for AutoShapes by following these steps:
These steps set defaults for the current document. If you want to set the defaults for all documents based on a particular template, load the template itself and perform the steps. Similarly, if you want to set the defaults for all documents, load the Normal.dot template and perform the steps.
You should realize that setting the AutoShape defaults in this manner does not affect all formatting settings for subsequent AutoShapes. In general, these steps set the defaults that appear on the Colors and Lines tab and the Layout tab of the Format AutoShape dialog box. Settings on other tabs, such as size, aspect ratio, and rotation, are not affected and must be set on a shape-by-shape basis.
WordTips is your source for cost-effective Microsoft Word training. (Microsoft Word is the most popular word processing software in the world.) This tip (74) applies to Microsoft Word 97, 2000, 2002, and 2003.

The First and Last Word on Word! Bestselling For Dummies author Dan Gookin puts his usual fun and friendly candor back to work to show you how to navigate Word 2019. Spend more time working and less time trying to figure it all out! Check out Word 2019 For Dummies today!
Do you struggle with getting your graphics and surrounding text to appear just the way you want it? Here are some ...
Discover MoreDrawing objects are easily added to a document. You can group these objects so they are easier to manage by following the ...
Discover MoreNeed to know how many graphics a document contains? Getting at the true number may take a little more work than it first ...
Discover MoreFREE SERVICE: Get tips like this every week in WordTips, a free productivity newsletter. Enter your address and click "Subscribe."
There are currently no comments for this tip. (Be the first to leave your comment—just use the simple form above!)
Got a version of Word that uses the menu interface (Word 97, Word 2000, Word 2002, or Word 2003)? This site is for you! If you use a later version of Word, visit our WordTips site focusing on the ribbon interface.
Visit the WordTips channel on YouTube

FREE SERVICE: Get tips like this every week in WordTips, a free productivity newsletter. Enter your address and click "Subscribe."
Copyright © 2026 Sharon Parq Associates, Inc.
Comments