Please Note: This article is written for users of the following Microsoft Word versions: 97, 2000, 2002, and 2003. If you are using a later version (Word 2007 or later), this tip may not work for you. For a version of this tip written specifically for later versions of Word, click here: Removing All Text Boxes In a Document.
Written by Allen Wyatt (last updated June 4, 2020)
This tip applies to Word 97, 2000, 2002, and 2003
If you do a lot of work with documents from other people, you may have a need to remove text boxes in those documents. If there are only one or two text boxes in the document, it is not that difficult to select them and delete them. What if there are 30, 40, or more text boxes, though? Deleting them individually can quickly get tedious.
One potential solution is a "brute force" method. Follow these steps:
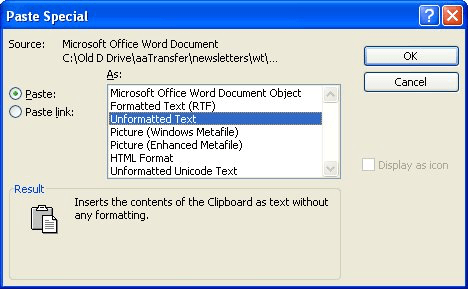
Figure 1. The Paste Special dialog box.
The document text, minus the text boxes, is now in the new document. The obvious drawback to this approach is that the other formatting of the original document is also lost, and you must reformat the entire document. (I told you this was a brute force method.)
If you want to get rid of only the text boxes, then the quickest solution is to use a macro. The following macro will quickly remove all text boxes in your document:
Sub RemoveTextBox1()
    Dim shp As Shape
    For Each shp In ActiveDocument.Shapes
        If shp.Type = msoTextBox Then shp.Delete
    Next shp
End Sub
You should realize that this macro removes all of the text boxes and their contents. In other words, if a text box is used for placement of text, then the text in that text box is deleted along with the text box itself.
If you prefer to transfer the text from the text boxes to the document, prior to deleting the text box, then a slight modification on the above macro will work:
Sub RemoveTextBox2()
    Dim shp As Shape
    Dim oRngAnchor As Range
    Dim sString As String

    For Each shp In ActiveDocument.Shapes
        If shp.Type = msoTextBox Then
            ' copy text to string, without last paragraph mark
            sString = Left(shp.TextFrame.TextRange.Text, _
              shp.TextFrame.TextRange.Characters.Count - 1)
            If Len(sString) > 0 Then
                ' set the range to insert the text
                Set oRngAnchor = shp.Anchor.Paragraphs(1).Range
                ' insert the textbox text before the range object
                oRngAnchor.InsertBefore _
                  "Textbox start << " & sString & " >> Textbox end"
            End If
            shp.delete
        End If
    Next shp
End Sub
When this macro is done, you can do a search for "Textbox start" and you will be at the beginning of text that used to be in the text boxes that are now gone from your document. You can then edit the text so that it appears as you want.
Note:
WordTips is your source for cost-effective Microsoft Word training. (Microsoft Word is the most popular word processing software in the world.) This tip (1690) applies to Microsoft Word 97, 2000, 2002, and 2003. You can find a version of this tip for the ribbon interface of Word (Word 2007 and later) here: Removing All Text Boxes In a Document.

The First and Last Word on Word! Bestselling For Dummies author Dan Gookin puts his usual fun and friendly candor back to work to show you how to navigate Word 2019. Spend more time working and less time trying to figure it all out! Check out Word 2019 For Dummies today!
If you use the INCLUDEPICTURE field to add images to your document, you may love the macro in this tip. It allows you to ...
Discover MoreThe names you use for macros can affect what you see when you add those macros to a toolbar. This tip explains how you ...
Discover MoreMacros are often used to process documents, resulting in changes of one manner or another. If you need your macro to add ...
Discover MoreFREE SERVICE: Get tips like this every week in WordTips, a free productivity newsletter. Enter your address and click "Subscribe."
2017-03-23 19:18:05
juan
This I already knew. What I wanted was to eliminate these ghost rectangles that appear like floating in everyword document:
Just on Word. Word for Mac.
Badly phrased your security question. Should have been what is 8 plus 7, The way it is phrased could be understood the answer to be 1
2016-09-05 21:59:25
Dana Cole
I don't want to subscribe to any newsletters, but I do want to say how grateful I am for all the incredibly valuable tips you have provided over the years. For help with Word, your site is consistently the best, over and over again. You have helped me out of a lot of jams, so THANK YOU! I am committed to using Word 2000 as long as I can simply because it is better than all the other, later versions of Word that I have tried. I am on a very limited income, but if you want to point me to a Paypal link, I'll be happy to donate what I can.
2016-07-22 21:48:04
Ken Endacott
A text box is a shape comprising a rectangle with a textframe and text. However a rectangle to which a textframe has been subsequently added looks and acts the same but is not a textbox. Confusing isn't it?
It would seem that your "pictures" are rectangles (or perhaps another shape such as a rectangle with rounded corners) containing textframes. The above macros only process textboxes and not other shapes containing text.
The following macro will step through every shape in the document and if a shape contains a textframe, extract the text and delete the shape. Because textboxes are a subset of shapes they will also be processed. The text is placed at the shape anchor point which usually is at the start of a paragraph.
Sub ExtractTextInShapes()
Dim shp As Shape
Dim oRngAnchor As Range
Dim sString As String
Dim txtFrame As TextFrame
For Each shp In ActiveDocument.Shapes
Set txtFrame = Nothing
On Error Resume Next
Set txtFrame = shp.TextFrame
On Error GoTo 0
If Not txtFrame Is Nothing Then
If shp.TextFrame.HasText Then
sString = shp.TextFrame.TextRange.Text
Set oRngAnchor = shp.Anchor.Paragraphs(1).Range
oRngAnchor.InsertBefore _
"Textbox start << " & sString & " >> Textbox end"
shp.Delete
End If
End If
Next shp
End Sub
2016-07-21 10:54:12
John
Never mind sorry, turns out my "text box" is classified as a "picture". Since the "picture" has plain text inside the box which I can edit at will, I had hoped to be able to extract the text but remove the "picture" formatting (in a 500 page word documents with a thousand of those "pictures". Seems impossible.
2016-07-21 10:37:30
John
"The document text, minus the text boxes, is now in the new document"
This is WRONG, the boxes stay.
2016-04-04 12:21:24
Thomas Strømdahl
I can't see that RemoveTextBox1 deletes texboxes in header/footer. Looks like you have to loop through all story ranges and shape ranges. If you use for each shape in shaperanges and delete it, it misses to delete all.
This works bettter on my documents:
Sub RemoveAllTextBoxes()
Dim rStory As Range
Dim shp As Shape
Dim ShapeNo As Integer
For Each rStory In ActiveDocument.StoryRanges
For ShapeNo = rStory.ShapeRange.Count To 1 Step -1
Set shp = rStory.ShapeRange(ShapeNo)
If shp.Type = msoTextBox Then shp.Delete
Next ShapeNo
Next rStory
End Sub
2015-11-30 02:39:07
ELLIOT
I DIDN'T KNOW HOW TO USE EXCEL OR ANY ONLINE PROGRAMMING THING BUT I WENT TO THESE TWO SITES: https://www.youtube.com/watch?v=sQWlwSnWI2g
https://www.youtube.com/watch?v=6LpKsQtOSPQ
AND THEY EXPLAINED HOW TO PUT IN A MACRO
I SELECTED ALL THE TEXT BOXES AND PRESSED RUN PROGRAM (ALL 62 TEXT BOXES) AND RAN THE PROGRAM.
PROBLEM: I HAD THE PROGRAM RUNNING FOR A COUPLE MINUETS AND NOTHING HAPPENED, SO I STOPPED IT AND DON'T KNOW WHAT TO DO NOW.
ALSO, I CAN'T GET THE COMMENTS TO WORK, WHEN TRYING IT THE FIRST TIME.
PS:
ALSO, I DON'T KNOW WHAT 4+5=
I'M JUST KIDDING, ABOUT THAT. I'M NOT A ROBOT.
Got a version of Word that uses the menu interface (Word 97, Word 2000, Word 2002, or Word 2003)? This site is for you! If you use a later version of Word, visit our WordTips site focusing on the ribbon interface.
Visit the WordTips channel on YouTube

FREE SERVICE: Get tips like this every week in WordTips, a free productivity newsletter. Enter your address and click "Subscribe."
Copyright © 2026 Sharon Parq Associates, Inc.
 Please Note:
This article is written for users of the following Microsoft Word versions: 97, 2000, 2002, and 2003. If you are using a later version (Word 2007 or later), this tip may not work for you. For a version of this tip written specifically for later versions of Word, click here:
Please Note:
This article is written for users of the following Microsoft Word versions: 97, 2000, 2002, and 2003. If you are using a later version (Word 2007 or later), this tip may not work for you. For a version of this tip written specifically for later versions of Word, click here:
Comments