Written by Allen Wyatt (last updated June 25, 2018)
This tip applies to Word 97, 2000, 2002, and 2003
Many users have several macros to which they would like to assign shortcut keys. However, as you acquire more macros, it becomes difficult to remember the shortcut keys. It would be nice to have a list of macros with their shortcut keys readily available. It would be even nicer to have such a list and have the option of clicking the shortcut key to run the macro.
The solution is a two-step process. First, create a Macros menu, and second add a dozen or so of your most commonly used macros. If done with some foresight, you can type three keys to run any commonly used macro.
For simplicity, suppose you have the following macros, many of which have appeared in other issues of WordTips: AddParens, AddQuotes, EmailCleanup, and TwoSpaces. Make sure that the template containing your macros is loaded into Word, and then create a Macros menu, as follows.
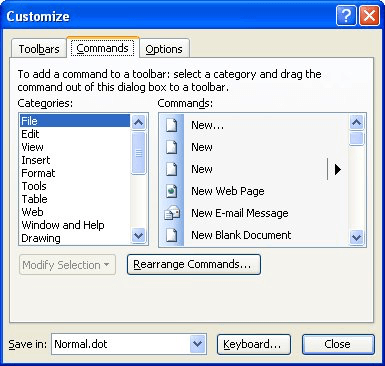
Figure 1. The Commands tab of the Customize dialog box
You now have a Macros menu, and you could end your customizations. It won't do you much good, however, because your Macros menu, while available on the menu bar, is empty. To put the macros mentioned above on the menu, do the following with the Customize dialog box still visible:
Now you have several benefits. By typing Alt+M, the Macros menu opens. At that point, you can look to see the name of any macro and the letter that will activate it. The letter after the ampersand (step 3, above) is underlined and activates the macro. You also have the option of using the arrow keys to select a menu option, or clicking on the menu option as you would with any other menu.
If you decide to solely use the keyboard shortcuts, within a short time you will remember that typing Alt+M, P runs the AddParens macro; Alt+M, Q runs the AddQuotes macro; Alt+M, E runs the EmailCleanup macro, and Alt+M, T runs the TwoSpaces macro.
Note:
WordTips is your source for cost-effective Microsoft Word training. (Microsoft Word is the most popular word processing software in the world.) This tip (812) applies to Microsoft Word 97, 2000, 2002, and 2003.

Do More in Less Time! An easy-to-understand guide to the more advanced features available in the Microsoft 365 version of Word. Enhance the quality of your documents and boost productivity in any field with this in-depth resource. Complete your Word-related tasks more efficiently as you unlock lesser-known tools and learn to quickly access the features you need. Check out Microsoft 365 Word For Professionals For Dummies today!
It can be disconcerting when a custom menu you've used for years suddenly loses all the options it previously contained. ...
Discover MoreWord is quite versatile in how you can customize it. You can add all sorts of macros to menus, but doing so may cause ...
Discover MoreWant to get rid of some menu options so that they can't be selected? It's easy to do when customizing Word by using these ...
Discover MoreFREE SERVICE: Get tips like this every week in WordTips, a free productivity newsletter. Enter your address and click "Subscribe."
There are currently no comments for this tip. (Be the first to leave your comment—just use the simple form above!)
Got a version of Word that uses the menu interface (Word 97, Word 2000, Word 2002, or Word 2003)? This site is for you! If you use a later version of Word, visit our WordTips site focusing on the ribbon interface.
Visit the WordTips channel on YouTube

FREE SERVICE: Get tips like this every week in WordTips, a free productivity newsletter. Enter your address and click "Subscribe."
Copyright © 2026 Sharon Parq Associates, Inc.
Comments