Positioning the Cursor in a New Document

Written by Allen Wyatt (last updated March 29, 2022)
This tip applies to Word 97, 2000, 2002, and 2003


1

If you are creating standard templates for your company, you may want to go one step further and make sure the cursor (insertion point) is positioned at a particular location whenever a new document is created that is based on the template. This can come in handy, as it ensures that the insertion point is at the proper place to begin typing in the new document.

This is a relatively easy process to do. Follow these steps:

  1. Open the template on which the new documents are to be based.
  2. Position the insertion point at the position in the document where you want it positioned when you create a new document based on the template.
  3. Choose Bookmark from the Insert menu. Word displays the Bookmark dialog box. (See Figure 1.)
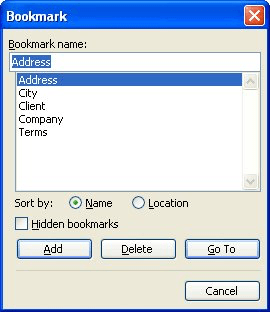
  4. Figure 1. The Bookmark dialog box.

  5. In the Bookmark Name field, enter a unique name for your bookmark, such as StartHere. (Notice there are no spaces in this bookmark name.)
  6. Click on the Add button. Word adds the new bookmark and closes the Bookmark dialog box.
  7. Press Ctrl+Home to go to the start of your template. (This step is not absolutely necessary, but it makes it easier to understand some of the later steps.)
  8. Choose Macro from the Tools menu, and then Record New Macro from the resulting submenu. This displays the Record Macro dialog box.
  9. Use the Macro Name of AutoNew. This must be a single word, capitalized as shown. (This is a special macro name that denotes a macro to be run whenever a new document is created.)
  10. Use the Store Macro In pull-down list to select the name of the template on which you are working.
  11. Click on OK. Your macro is now being recorded.
  12. Press F5. This displays the Go To tab of the Find and Replace dialog box.
  13. In the Go To What list, select Bookmark. (See Figure 2.)
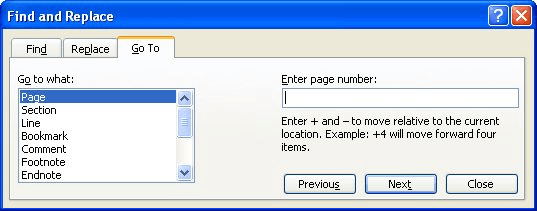
  14. Figure 2. The Go To tab of the Find and Replace dialog box.

  15. Using the drop-down list labeled Enter Bookmark Name, select the name of the bookmark you defined in step 4.
  16. Click on Go To. You should now jump to the location of where you set the bookmark.
  17. Click on Close to get rid of the Find and Replace dialog box.
  18. Click on the Stop Recording tool to stop your macro.
  19. Save and close your template.

That's it! The next time you create a document based on the template, the AutoRun macro will automatically execute, and you will jump to the designated spot.

Note:

If you would like to know how to use the macros described on this page (or on any other page on the WordTips sites), I've prepared a special page that includes helpful information. Click here to open that special page in a new browser tab.

WordTips is your source for cost-effective Microsoft Word training. (Microsoft Word is the most popular word processing software in the world.) This tip (1569) applies to Microsoft Word 97, 2000, 2002, and 2003.

Author Bio

Allen Wyatt

With more than 50 non-fiction books and numerous magazine articles to his credit, Allen Wyatt is an internationally recognized author. He is president of Sharon Parq Associates, a computer and publishing services company. ...

MORE FROM ALLEN

Locking Callouts to a Graph Location

If you add callouts using the drawing tools in Excel, you may have noticed that they don't always stay where you expect ...

Discover More

TOC Heading Numbers Always Show in Bold

Linda's got a document that includes a table of contents that is based on headings in the document. When the headings ...

Discover More

Applying a Character Style to Bracketed Text

Word has a powerful Find and Replace capability. It is even more powerful if you turn on its wildcard capability. Here's ...

Discover More

Create Custom Apps with VBA! Discover how to extend the capabilities of Office 365 applications with VBA programming. Written in clear terms and understandable language, the book includes systematic tutorials and contains both intermediate and advanced content for experienced VB developers. Designed to be comprehensive, the book addresses not just one Office application, but the entire Office suite. Check out Mastering VBA for Microsoft Office 365 today!

More WordTips (menu)

Opening Documents in Print Layout View

If you have a Word 2003 document that always seems to open in reading layout mode, you may want to turn that "feature" ...

Discover More

Removing All File Properties

Want to get rid of any properties you've created for a document? You can do so by using the short macro described in this ...

Discover More

Opening a Word Document when Starting the Computer

Some people use their computers for little else, other than to work on Word documents. If that is the case with you, then ...

Discover More
Subscribe

FREE SERVICE: Get tips like this every week in WordTips, a free productivity newsletter. Enter your address and click "Subscribe."

View most recent newsletter.

Comments

If you would like to add an image to your comment (not an avatar, but an image to help in making the point of your comment), include the characters [{fig}] (all 7 characters, in the sequence shown) in your comment text. You’ll be prompted to upload your image when you submit the comment. Maximum image size is 6Mpixels. Images larger than 600px wide or 1000px tall will be reduced. Up to three images may be included in a comment. All images are subject to review. Commenting privileges may be curtailed if inappropriate images are posted.

What is 5 - 3?

2024-01-24 11:43:01

Jim Epler

Microsoft Word for Mac (Microsoft 360) doesn't permit macros to be saved in document templates, unfortunately. Otherwise, cool tip!


This Site

Got a version of Word that uses the menu interface (Word 97, Word 2000, Word 2002, or Word 2003)? This site is for you! If you use a later version of Word, visit our WordTips site focusing on the ribbon interface.

Videos
Subscribe

FREE SERVICE: Get tips like this every week in WordTips, a free productivity newsletter. Enter your address and click "Subscribe."

(Your e-mail address is not shared with anyone, ever.)

View the most recent newsletter.