If you routinely receive documents from different people, you may be wondering if there is a way to format the documents so they all look the same. It can be frustrating to work with documents where everyone has a different idea of what looks "good" on a printed page.
The tried-and-true method of standardizing the formatting of information in a document is to simply use styles. If you define a set of styles that cover all your formatting needs, you can then store these in a template that can be easily applied to a multitude of documents. You then attach the template to a document by following these steps:
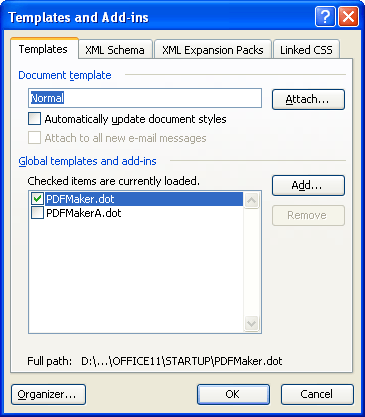
Figure 1. The Templates and Add-ins dialog box.
These few simple steps apply the formatting in the template to the open document. What does this mean? It means that the appearance of anything formatted with styles in the current document will be updated to reflect styles with the same names in the template. For instance, if there is a Body Text format in both the document and the template, the style definitions in the template will override those in the document, thereby standardizing the appearance of the document.
There are a couple of big caveats to this, of course. If the document does not utilize styles, or if the character formatting in the document has been explicitly overridden (in other words, the user selected text and used the Font dialog box or toolbars to format text), then attaching the template to the document will have no appreciable effect on the text. You will still need to go through the document and manually apply the styles from the newly attached template.
The other thing that is not updated when you attach a new template is information contained in the Page Setup dialog box. Thus, things like paper size, margins, header and footer locations, and orientation are not affected. These need to be either updated manually on a document-by-document basis, or done as a whole through the use of a macro. The framework for such a macro is as follows:
Sub MassFormatFiles
    Dim JName As String

    Dialogs(wdDialogFileOpen).Show
    Application.ScreenUpdating = False
    JName = Dir("*.doc")
    While (JName > "")
        Application.Documents.Open FileName:=JName

            'Do formatting here

        ActiveDocument.Close SaveChanges:=wdSaveChanges
        JName = Dir()
    Wend
    Application.ScreenUpdating = True
End Sub
Remember that is only a framework. To use the macro, you need to replace the "Do formatting here" comment with the actual commands that do the formatting you want done to each file. You can copy these commands from a macro where you recorded the formatting steps, if desired.
When you run the macro, you will see a regular Open dialog box. All you need to do is display the folder whose files you want to process, and then click on Open. Each file is opened in turn, formatted (with your supplied formatting commands) and then saved again.
You should understand that any time you attempt to do any "mass formatting" across documents, you run the risk of messing the documents up in some unforeseen way. Why? Because there may be some relatively small but important difference in between documents that gets clumsily messed up by being overridden when applying the common formats. No amount of automatic formatting will compensate for manually looking through each page of a document to assure that everything appears as it should.
Note:
WordTips is your source for cost-effective Microsoft Word training. (Microsoft Word is the most popular word processing software in the world.) This tip (1516) applies to Microsoft Word 97, 2000, 2002, and 2003.

Learning Made Easy! Quickly teach yourself how to format, publish, and share your content using Word 2021 or Microsoft 365. With Step by Step, you set the pace, building and practicing the skills you need, just when you need them! Check out Microsoft Word Step by Step today!
Want to have objects such as text boxes and shapes always appear using some formatting you like? Here are some ideas on ...
Discover MoreWhen you add superscripts to words in your document, you may not want those superscripts to be spell-checked. Here's how ...
Discover MoreWhen adjusting the position of things on the ruler (like tab stops), you can use the Alt key to get very precise in your ...
Discover MoreFREE SERVICE: Get tips like this every week in WordTips, a free productivity newsletter. Enter your address and click "Subscribe."
There are currently no comments for this tip. (Be the first to leave your comment—just use the simple form above!)
Got a version of Word that uses the menu interface (Word 97, Word 2000, Word 2002, or Word 2003)? This site is for you! If you use a later version of Word, visit our WordTips site focusing on the ribbon interface.
Visit the WordTips channel on YouTube

FREE SERVICE: Get tips like this every week in WordTips, a free productivity newsletter. Enter your address and click "Subscribe."
Copyright © 2026 Sharon Parq Associates, Inc.
Comments