Written by Allen Wyatt (last updated July 16, 2022)
This tip applies to Word 97, 2000, 2002, and 2003
Patricia wrote about a problem she was having with Word. It seems that she would work with a Word document, and then look at it in Print Preview to make sure everything was exactly the say she wanted. When it was just right, she would print the document. Everything looked good in the printout, except that the page breaks were not in the same place as they had been when looking at the document in Print Preview. Patricia wondered what could cause the problem.
There are many possible causes for this type of problem, so finding a solution may take some trial and error on your part. The first thing to check is to make sure that you have the latest and greatest printer drivers installed in Windows for your printer. The best place to find this out is by visiting the Web site for your printer manufacturer and checking to see if they have an updated printer driver available for your version of Windows.
The second thing to check is that you are using the same printer for the Print Preview as you are for printing. If you work in an office that has multiple printers available, and you have multiple printer drivers installed in Windows, you can—in the Print dialog box—select which printer you want to use. The printer selected in the Print dialog box controls how information is displayed by Word in Print Preview and when actually printing. If you examine a document in Print Preview, then display the Print dialog box and choose a different printer before printing, then the output to the printer may be different than what you saw in Print Preview. (See Figure 1.)
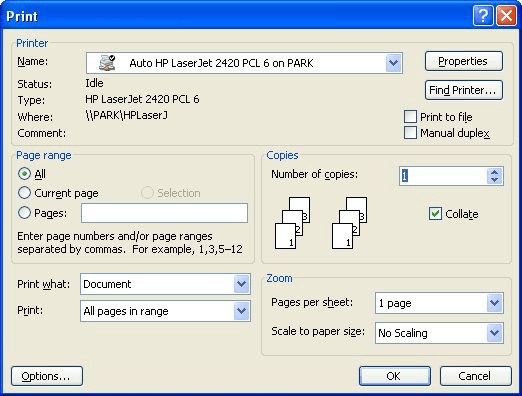
Figure 1. The Print dialog box.
Careful consideration of these first two potential causes leads to a third potential cause—someone switched your printer. This may sound odd, but sometimes happens in an office environment where a single printer is shared by multiple users. Let's say that you are used to using a Fabutek 2750 printer, and you have the proper drivers installed for that mythical printer. One day, however, someone physically swaps the Fabutek 2750 printer for a newer model: the Fabutek 2950. If you don't upgrade your printer driver, then you can get different printed results than what you expect.
While on the subject of printer drivers, there is another thing that could be causing problems. In modern computer systems, printer drivers tend to be programs in their own right. You can configure printer drivers to do all sorts of things with your printer. One thing that many printer drivers allow you to do is to control whether fonts are sent to the printer or not. If the printer driver is set to not send fonts, then the printer will substitute a native font (one residing in the firmware of the printer itself) for the font that was not downloaded by the printer driver. This font substitution may cause your pages to break differently than either you or Word would expect. Check your printer driver to make sure it is downloading fonts used in your document.
If you use fields in your document, it is very possible that the fields could be throwing off the pagination of your printed document. There are two settings on the Print tab of the Options dialog box (Tools | Options) that control how Word handles fields during printing. (See Figure 2.)
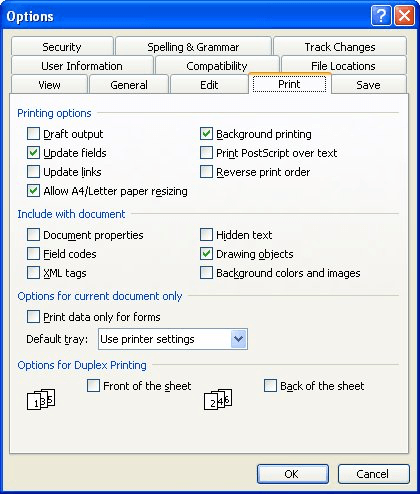
Figure 2. The Print tab of the Options dialog box.
The Field Codes check box is used to indicate whether the printed document shows field results or the raw field codes. This check box also affects Print Preview, and the field codes should display there according to your selection of the check box.
The Update Fields check box on the Print tab can be problematic. To use a simplistic example, let's say that you have a field that inserts the current date and time. When you use Print Preview, the date and time show as you would expect. However, when you print, the field code is updated and the date and time when you printed is used. This could cause the text within the field's paragraph to wrap differently, which could easily affect pagination. The solution is to make sure the Update Fields check box is cleared, and then manually update all fields before using Print Preview and subsequently printing.
Another check box on the Print tab of the Options dialog box can also cause differences in formatting on a printout. Notice the check box labeled Allow A4/Letter Paper Resizing. When this check box is selected, Word will automatically reformat your printout if the paper size specified in the Page Setup dialog box is Letter, and the paper size in your printer is A4 (or vice versa). This will definitely affect page breaks on a printout. If you uncheck the check box, you will need to make sure that your designated paper size matches the paper you will be printing on.
There is one other place you can check, as well. Take a look at the Compatibility tab in the Options dialog box. This dialog box lists quite a few settings that can modify the behavior of Word. One of the settings in the list is called Use Printer Metrics to Lay Out Document. By default, this option is not selected. With it unselected, Word uses its own internal measurements to determine how a document appears on a printed page. This results in faster operation of Word and more consistent appearance of the document. (See Figure 3.)
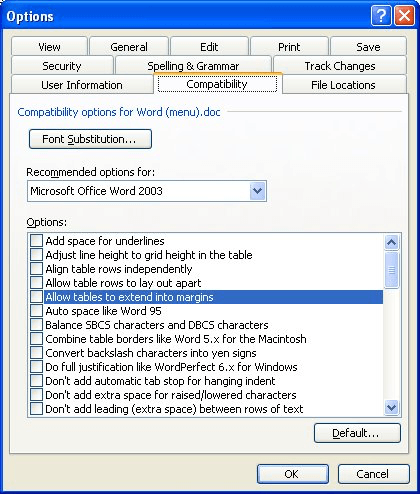
Figure 3. The Compatibility tab of the Options dialog box.
There is a drawback, however. It is possible that with some printers the metrics that Word uses may differ from the metrics the printer users. Thus, what you see on the screen (even in Print Preview) could differ slightly from when the document is actually printed. Why? Because when the printed document is handed over to the printer driver, then the printer's metrics are used instead of Word's internal metrics. If you suspect this is a problem for you, select the Use Printer Metrics to Lay Out Document check box. Word will then query the printer driver and use its metrics when doing layout.
WordTips is your source for cost-effective Microsoft Word training. (Microsoft Word is the most popular word processing software in the world.) This tip (91) applies to Microsoft Word 97, 2000, 2002, and 2003.

The First and Last Word on Word! Bestselling For Dummies author Dan Gookin puts his usual fun and friendly candor back to work to show you how to navigate Word 2019. Spend more time working and less time trying to figure it all out! Check out Word 2019 For Dummies today!
If you use multiple printers, you may wonder how to set each document in Word to remember which printer to use for that ...
Discover MoreWant to add crop marks to a printout? It's easy to do, provided you are using a PostScript printer.
Discover MoreIf you can produce output on a number of different printers, you may want Word to indicate on your printouts which ...
Discover MoreFREE SERVICE: Get tips like this every week in WordTips, a free productivity newsletter. Enter your address and click "Subscribe."
2023-10-05 12:08:27
Zoe
THANK YOU !!! Yours was the only article that helped (Printer Driver issue wreaking havoc with actual printed margins and labels not aligning)
Got a version of Word that uses the menu interface (Word 97, Word 2000, Word 2002, or Word 2003)? This site is for you! If you use a later version of Word, visit our WordTips site focusing on the ribbon interface.
Visit the WordTips channel on YouTube

FREE SERVICE: Get tips like this every week in WordTips, a free productivity newsletter. Enter your address and click "Subscribe."
Copyright © 2026 Sharon Parq Associates, Inc.
Comments