Please Note: This article is written for users of the following Microsoft Word versions: 2000, 2002, and 2003. If you are using a later version (Word 2007 or later), this tip may not work for you. For a version of this tip written specifically for later versions of Word, click here: Adding an Optional Break.
One of the special characters available in Word is the no-width optional break. This character, which is not available in Word 97, is primarily intended for use in Asiatic languages, but can be of use to those of us working in English. Consider the following sentence: The best solution is to write/revise/reissue documents. In this case, you've created a very long word consisting of three individual words separated by slashes. As the artificially long word reaches the end of a line, Word treats it as a single word and will move the entire thing to the next line, if wrapping is necessary.
One way around this problem is to insert a no-width optional break after each slash:
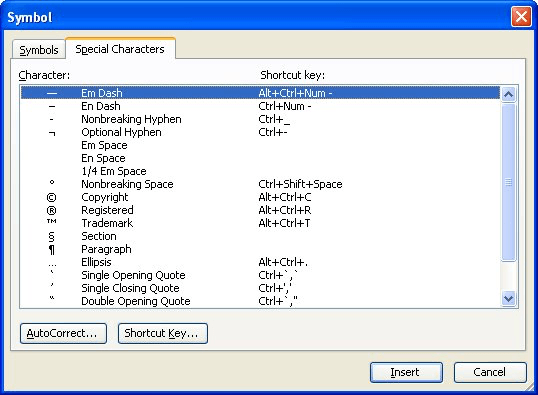
Figure 1. The Symbol dialog box.
What you see on the screen when you insert the no-width optional break depends on how you have configured your system. If you have non-printing characters hidden, then you won't see a thing, but the character is still there. (You can detect it by moving across the character position by using the left or right arrow keys.) If you have non-printing characters visible on the screen (Tools | Options | View tab | All), then the character shows up as a small, gray double-wall box.
As an interesting side note, you must choose the All option on the View tab. If you instead choose the individual character options (Tab Characters, Spaces, Paragraph Marks, Hidden Text, and Optional Hyphens), the no-width optional break still won't be visible—you must choose All.
Now, as your artificially long word approaches the end of the line, Word wraps the text based on the position of the no-width optional break. Since the character has no width, the result is that it appears like the word wraps right after the slash.
For grammatical purists in the audience, I know that the absolute best solution is to do away with slashes between words. For instance, it would be better to say "The best solution is to write, revise, or reissue documents." Unfortunately, not all clients want the grammatically correct solution, or they have a penchant for slashes. In that case, the no-width optional break can be very handy.
WordTips is your source for cost-effective Microsoft Word training. (Microsoft Word is the most popular word processing software in the world.) This tip (3834) applies to Microsoft Word 2000, 2002, and 2003. You can find a version of this tip for the ribbon interface of Word (Word 2007 and later) here: Adding an Optional Break.

The First and Last Word on Word! Bestselling For Dummies author Dan Gookin puts his usual fun and friendly candor back to work to show you how to navigate Word 2019. Spend more time working and less time trying to figure it all out! Check out Word 2019 For Dummies today!
Do you need to frequently add en spaces and em spaces to your documents? You can add special tools to Word that make ...
Discover MoreWant to delete the current page? There is no automatic command to perform this task in Word, but you can create your own ...
Discover MoreIf you need to get rid of a lot of paragraphs in a document, it's easy to do as long as the document relies on styles for ...
Discover MoreFREE SERVICE: Get tips like this every week in WordTips, a free productivity newsletter. Enter your address and click "Subscribe."
There are currently no comments for this tip. (Be the first to leave your comment—just use the simple form above!)
Got a version of Word that uses the menu interface (Word 97, Word 2000, Word 2002, or Word 2003)? This site is for you! If you use a later version of Word, visit our WordTips site focusing on the ribbon interface.
Visit the WordTips channel on YouTube

FREE SERVICE: Get tips like this every week in WordTips, a free productivity newsletter. Enter your address and click "Subscribe."
Copyright © 2026 Sharon Parq Associates, Inc.
 Please Note:
This article is written for users of the following Microsoft Word versions: 2000, 2002, and 2003. If you are using a later version (Word 2007 or later), this tip may not work for you. For a version of this tip written specifically for later versions of Word, click here:
Please Note:
This article is written for users of the following Microsoft Word versions: 2000, 2002, and 2003. If you are using a later version (Word 2007 or later), this tip may not work for you. For a version of this tip written specifically for later versions of Word, click here:
Comments