Creating Oval Pictures

Written by Allen Wyatt (last updated June 22, 2019)
This tip applies to Word 97, 2000, 2002, and 2003


You know that Word allows you to insert pictures in your document. Most pictures are rectangular in shape. What happens if you want your picture to be oval or some other non-rectangular shape, however?

Perhaps the most universal solution is to use a picture-editing program to make your edits to the picture. For instance, you could use Adobe PhotoShop or Paint Shop Pro or Microsoft's Photo Editor to change the picture directly, before placing it into Word. This approach will work with any version of Word.

If you don't have access to picture-editing software, you can use AutoShapes within Word to create your oval (or some other shape), and then fill that AutoShape with your picture. To do this, follow these steps:

  1. Make sure the Drawing toolbar is displayed. You can either click on the Drawing tool on the standard toolbar, or you can use the Toolbars option from the View menu.
  2. Click on the AutoShapes tool on the Drawing toolbar. Word displays a menu of shape categories.
  3. Select the shape category desired. If you want to create an oval, choose the Basic Shapes category. Word displays a collection of shapes in the category.
  4. Click on the exact shape wanted. If you want an oval, pick the shape closest to what you desire. (There is actually an oval shape in the category; it is the first shape in the third row.) Your mouse pointer turns into cross hairs.
  5. Click in your document where you want the shape to appear and drag the mouse until the shape appears as you desire. Release the mouse button when the shape is correct. The shape should remain selected.
  6. Beside the Fill tool on the Drawing toolbar is a small down-arrow. Click on this down-arrow. Word displays a palette of fill colors and a couple of other options.
  7. Choose Fill Effects from the palette. Word displays the Fill Effects dialog box.
  8. Make sure the Picture tab is selected. (See Figure 1.)
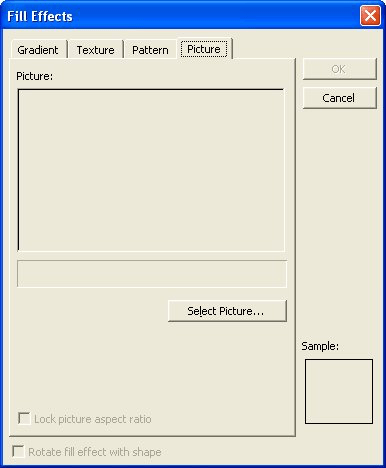
  9. Figure 1. The Picture tab of the Fill Effects dialog box.

  10. Click on Select Picture. Word displays the Select Picture dialog box, which looks like a standard Open dialog box.
  11. Use the controls in the dialog box to select the picture you want to place in the oval.
  12. Click on the OK button. The Fill Effects dialog box reappears with your selected picture displayed.
  13. Click on OK. The shape you created is filled with the picture you selected.

Once the picture appears in the shape, you can adjust the size of the shape as you normally would to make it appear as desired. You may need to play with this method of creating pictures a bit, as Word has been known to distort the pictures slightly. With a little practice, however, you may get exactly the effect you desire, without resorting to using an external picture-editing program.

There is also another way to place a picture within an oval in Word (any version), but it requires just a bit more work. In this approach, you really use two images: your original picture and an AutoShape. Follow these general steps:

  1. Place your picture in Word and format it to the size wanted.
  2. Create an oval and place it over the top of your picture. (Make sure the oval is in front of the picture.)
  3. Right-click on the oval to display a Context menu.
  4. Choose Format AutoShape from the Context menu. Word displays the Format AutoShape dialog box. (See Figure 2.)
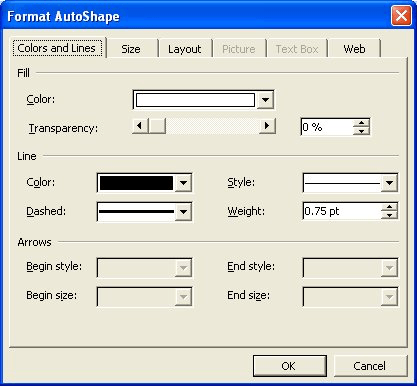
  5. Figure 2. The Format AutoShape dialog box.

  6. Using the tabs and other controls in the dialog box, make sure the oval is formatted so it has no fill and so the line used for the oval is white and very thick. (Typically, the line width should be 40 or more points.)
  7. Click on OK.
  8. Adjust the size of the oval as desired. You may need to change the line width again so that all the edges of your picture are covered.

This can be viewed as a brute-force method of placing your photo in an oval, but it does have the advantage that the picture is not distorted in the oval at all.

WordTips is your source for cost-effective Microsoft Word training. (Microsoft Word is the most popular word processing software in the world.) This tip (1859) applies to Microsoft Word 97, 2000, 2002, and 2003.

Author Bio

Allen Wyatt

With more than 50 non-fiction books and numerous magazine articles to his credit, Allen Wyatt is an internationally recognized author. He is president of Sharon Parq Associates, a computer and publishing services company. ...

MORE FROM ALLEN

Word Count is Zero

If you use the Word Count tool and are surprised that it returns a count of 0, it could be because of what you selected ...

Discover More

Unhiding a Single Column

In a worksheet with lots of hidden columns it is a real pain to try to unhide just one or two columns. The best solution ...

Discover More

Upside-Down Printing

Putting words on the printed page is easy in Word. Rotating those words in different manners can be a bit trickier. This ...

Discover More

The First and Last Word on Word! Bestselling For Dummies author Dan Gookin puts his usual fun and friendly candor back to work to show you how to navigate Word 2013. Spend more time working and less time trying to figure it all out! Check out Word 2013 For Dummies today!

More WordTips (menu)

Editing Wrap Points

If you have a graphic that has text wrapping around it, you might want a way to modify the wrapping path used by Word. ...

Discover More

Automatically Formatting Graphics and AutoShapes

Want to change the graphics formatting defaults in Word? You can customize some of these defaults, saving yourself some time.

Discover More

Changing Compression Print Resolution

The resolution at which Word compresses graphics in a document may be bothersome. If it is, your options are very ...

Discover More
Subscribe

FREE SERVICE: Get tips like this every week in WordTips, a free productivity newsletter. Enter your address and click "Subscribe."

View most recent newsletter.

Comments

If you would like to add an image to your comment (not an avatar, but an image to help in making the point of your comment), include the characters [{fig}] (all 7 characters, in the sequence shown) in your comment text. You’ll be prompted to upload your image when you submit the comment. Maximum image size is 6Mpixels. Images larger than 600px wide or 1000px tall will be reduced. Up to three images may be included in a comment. All images are subject to review. Commenting privileges may be curtailed if inappropriate images are posted.

What is 6 - 0?

There are currently no comments for this tip. (Be the first to leave your comment—just use the simple form above!)


This Site

Got a version of Word that uses the menu interface (Word 97, Word 2000, Word 2002, or Word 2003)? This site is for you! If you use a later version of Word, visit our WordTips site focusing on the ribbon interface.

Videos
Subscribe

FREE SERVICE: Get tips like this every week in WordTips, a free productivity newsletter. Enter your address and click "Subscribe."

(Your e-mail address is not shared with anyone, ever.)

View the most recent newsletter.