Please Note: This article is written for users of the following Microsoft Word versions: 97, 2000, 2002, and 2003. If you are using a later version (Word 2007 or later), this tip may not work for you. For a version of this tip written specifically for later versions of Word, click here: Protecting Hidden Text.
Hidden text is a great help to those who want to "hide" certain parts of a document, either from viewing or from printing. However, it is not very good for hiding information that you don't want others to see in a document you are distributing. They (the ones to whom you are distributing the document) can display or print hidden text just as easily as you can.
There is no built-in feature of Word that allows you to "lock" hidden text so it can't be viewed. The best solution, then, is to simply remove all your hidden text as a last step before distributing your document. You can do this by using the Search and Replace features of Word, as follows:
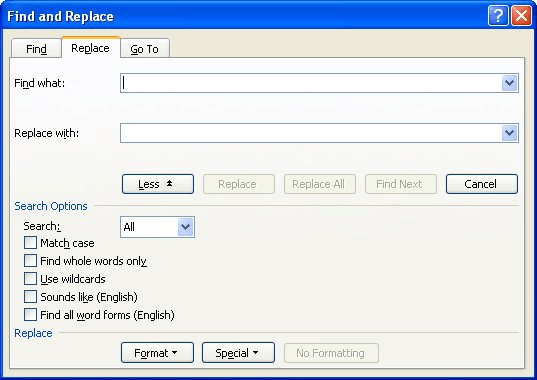
Figure 1. The Replace tab of the Find and Replace dialog box.
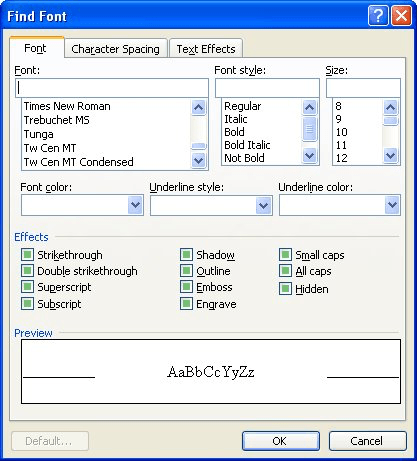
Figure 2. The Find Font dialog box.
If you find yourself stripping out hidden text quite a bit, you can automate the process by recording a macro that performs the above steps, or you can use the following macro:
Sub StripAllHidden()
    Dim rngsStories As Word.StoryRanges
    Dim rngStory As Word.Range

    On Error GoTo NoDocOpen
        Set rngsStories = ActiveDocument.StoryRanges
    On Error GoTo 0

    'Need to loop through all 'stories' to
    'remove hidden text from footnotes, headers,
    'etc. as well as body text.

    For Each rngStory In rngsStories
        With rngStory.Find
            .ClearFormatting
            .Font.Hidden = True
            Call .Execute(vbNullString, False, False, False, _
                False, False, True, wdFindContinue, True, _
                ReplaceWith:=vbNullString, _
                    Replace:=wdReplaceAll)
        End With
    Next
    Exit Sub
NoDocOpen:
End Sub
The other advantage of using this macro is that it will also look for hidden text in places where the regular Search and Replace function won't: footnotes, endnotes, headers, footers, etc.
Note:
WordTips is your source for cost-effective Microsoft Word training. (Microsoft Word is the most popular word processing software in the world.) This tip (625) applies to Microsoft Word 97, 2000, 2002, and 2003. You can find a version of this tip for the ribbon interface of Word (Word 2007 and later) here: Protecting Hidden Text.

Discover the Power of Microsoft Office This beginner-friendly guide reveals the expert tips and strategies you need to skyrocket your productivity and use Office 365 like a pro. Mastering software like Word, Excel, and PowerPoint is essential to be more efficient and advance your career. Simple lessons guide you through every step, providing the knowledge you need to get started. Check out Microsoft Office 365 For Beginners today!
Do you have a document in which you need to convert all the quoted text (text surrounded by quotes) to underlined text? ...
Discover MoreWord allows you to format your text in a number of different ways. One rather esoteric way to format your text is by ...
Discover MoreDrop caps can be a nice finishing touch for some types of documents. Word allows you to create three types of drop caps, ...
Discover MoreFREE SERVICE: Get tips like this every week in WordTips, a free productivity newsletter. Enter your address and click "Subscribe."
There are currently no comments for this tip. (Be the first to leave your comment—just use the simple form above!)
Got a version of Word that uses the menu interface (Word 97, Word 2000, Word 2002, or Word 2003)? This site is for you! If you use a later version of Word, visit our WordTips site focusing on the ribbon interface.
Visit the WordTips channel on YouTube

FREE SERVICE: Get tips like this every week in WordTips, a free productivity newsletter. Enter your address and click "Subscribe."
Copyright © 2026 Sharon Parq Associates, Inc.
 Please Note:
This article is written for users of the following Microsoft Word versions: 97, 2000, 2002, and 2003. If you are using a later version (Word 2007 or later), this tip may not work for you. For a version of this tip written specifically for later versions of Word, click here:
Please Note:
This article is written for users of the following Microsoft Word versions: 97, 2000, 2002, and 2003. If you are using a later version (Word 2007 or later), this tip may not work for you. For a version of this tip written specifically for later versions of Word, click here:
Comments