Please Note: This article is written for users of the following Microsoft Word versions: 97, 2000, 2002, and 2003. If you are using a later version (Word 2007 or later), this tip may not work for you. For a version of this tip written specifically for later versions of Word, click here: Turning Off Proofing for Superscripts.
Written by Allen Wyatt (last updated March 30, 2019)
This tip applies to Word 97, 2000, 2002, and 2003
Superscript text can be used for many purposes in a document. For instance, it is routinely used for footnote and endnote references. Some people use superscript text for "reference cues." These are not the same as regular footnote or endnote marks. For instance, the document may contain the text "productgreen" where "product" is normal text and "green" is superscript. The spell-check feature sees "productgreen" as one word, and marks it as incorrect. If you use superscript in this manner frequently, this can result in an avalanche of spell-check errors in the document.
The easiest way to get around this problem is to simply search for all the superscript text in your document and turn off proofing for it. Follow these steps:
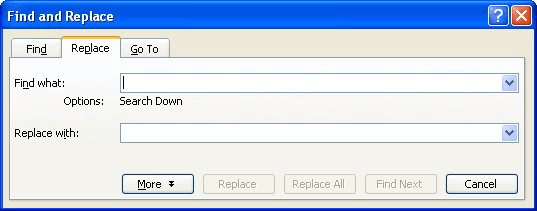
Figure 1. The Replace tab of the Find and Replace dialog box.
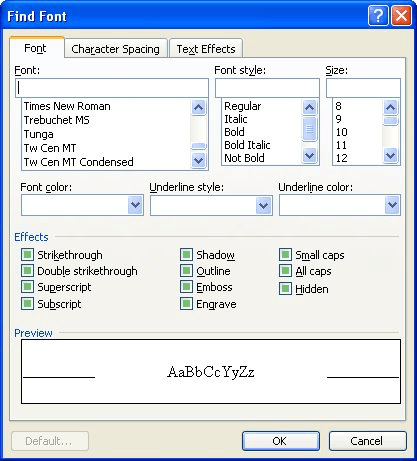
Figure 2. The Font tab of the Find Font dialog box.
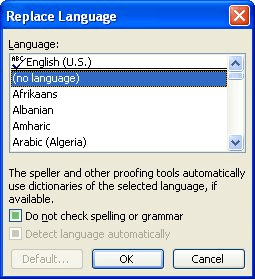
Figure 3. The Replace Language dialog box.
Word goes through the document and changes the language associated with any superscript text so it is exempt from the spell check or grammar checking features of Word.
For those of you who use styles, the even simpler approach is to set up a style for your reference cues, and then use it to format them. If you are using Word 97 or Word 2000, you follow these steps to set up the style:
If you are using Word 2002 or Word 2003, you follow these steps to set up the style:
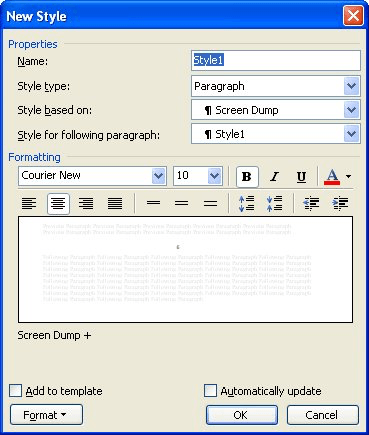
Figure 4. The New Style dialog box.
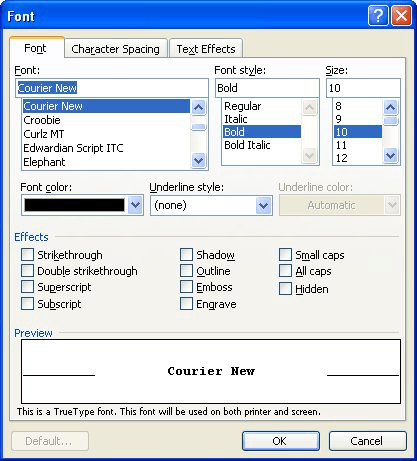
Figure 5. The Font dialog box.
With you new style defined, you simply need to apply it to any reference cue in your document. The style then takes care of superscripting your cues, as well as turning off proofing for them.
WordTips is your source for cost-effective Microsoft Word training. (Microsoft Word is the most popular word processing software in the world.) This tip (3880) applies to Microsoft Word 97, 2000, 2002, and 2003. You can find a version of this tip for the ribbon interface of Word (Word 2007 and later) here: Turning Off Proofing for Superscripts.

Comprehensive VBA Guide Visual Basic for Applications (VBA) is the language used for writing macros in all Office programs. This complete guide shows both professionals and novices how to master VBA in order to customize the entire Office suite for their needs. Check out Mastering VBA for Office 2010 today!
If you have a word that you need to make sure is formatted the same way throughout your document, there are several ways ...
Discover MoreWord allows you to format a paragraph so that it extends into the left margin of the document. This is done by setting a ...
Discover MoreWhen you format bulleted lists or numbered lists, you may be surprised if some of the bullets or numbers don't match the ...
Discover MoreFREE SERVICE: Get tips like this every week in WordTips, a free productivity newsletter. Enter your address and click "Subscribe."
There are currently no comments for this tip. (Be the first to leave your comment—just use the simple form above!)
Got a version of Word that uses the menu interface (Word 97, Word 2000, Word 2002, or Word 2003)? This site is for you! If you use a later version of Word, visit our WordTips site focusing on the ribbon interface.
Visit the WordTips channel on YouTube

FREE SERVICE: Get tips like this every week in WordTips, a free productivity newsletter. Enter your address and click "Subscribe."
Copyright © 2024 Sharon Parq Associates, Inc.
 Please Note:
This article is written for users of the following Microsoft Word versions: 97, 2000, 2002, and 2003. If you are using a later version (Word 2007 or later), this tip may not work for you. For a version of this tip written specifically for later versions of Word, click here:
Please Note:
This article is written for users of the following Microsoft Word versions: 97, 2000, 2002, and 2003. If you are using a later version (Word 2007 or later), this tip may not work for you. For a version of this tip written specifically for later versions of Word, click here:
Comments