When you install third-party add-ins for Word, they often add their own toolbars to the Word environment. One of the more common add-ins is Adobe Acrobat, which adds a toolbar that includes a couple of tools that are helpful in creating PDF files. You may want to hide the toolbars used by add-ins such as Acrobat, but in trying to do so you may find that hiding them is easier said than done.
Add-ins generally work by loading a Word template every time you start Word. This template often includes macros that are run automatically. It is these macros that add the appropriate toolbars and/or menu choices to the Word environment. If you hide the toolbars, then the next time Word starts, the add-in's template again runs a macro that displays the toolbar.
There are two ways to stop this behavior. The first is to locate the templates being automatically loaded, find the macros in those templates that are being automatically run, and make the changes in the macros. This is no small task, and if you make some mistakes it can cause more problems than it solves.
The other solution is to simply move the offending templates so they are not automatically started when you start Word. Follow these steps:
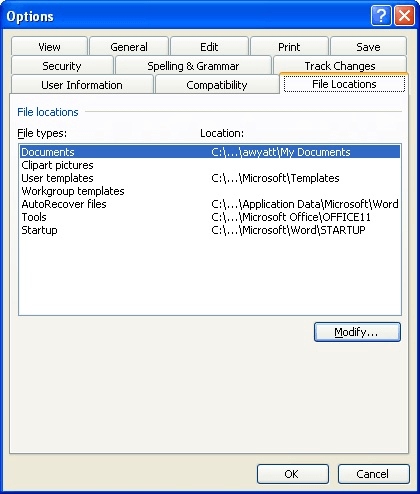
Figure 1. The File Locations tab of the Options dialog box.
Whatever is in this folder is automatically loaded when Word starts. If you don't want something to load, simply move it to another folder, or rename it so it doesn't have a DOC or DOT extension. For instance, in the case of Acrobat, you should see a file named PDFMaker.dot. If you move this file somewhere else, then it will not load when Word starts, and you won't see the Acrobat toolbar in Word.
For those times when you do want to use the toolbar, you can choose to manually load PDFMaker.dot as a template. Just follow these steps:
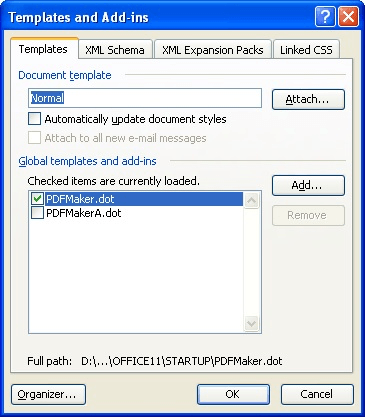
Figure 2. The Templates and Add-ins dialog box.
WordTips is your source for cost-effective Microsoft Word training. (Microsoft Word is the most popular word processing software in the world.) This tip (52) applies to Microsoft Word 97, 2000, 2002, and 2003.

Create Custom Apps with VBA! Discover how to extend the capabilities of Office 365 applications with VBA programming. Written in clear terms and understandable language, the book includes systematic tutorials and contains both intermediate and advanced content for experienced VB developers. Designed to be comprehensive, the book addresses not just one Office application, but the entire Office suite. Check out Mastering VBA for Microsoft Office 365 today!
What are you to do if you find that you have no fonts available in Word, but they are available in other programs? There ...
Discover MoreWhen looking at your document in Draft view, you may want Word to use a larger font than what it normally does. Here's ...
Discover MoreAdd-ins can be stored in a number of different places on a computer system. This tip explains the many different places ...
Discover MoreFREE SERVICE: Get tips like this every week in WordTips, a free productivity newsletter. Enter your address and click "Subscribe."
There are currently no comments for this tip. (Be the first to leave your comment—just use the simple form above!)
Got a version of Word that uses the menu interface (Word 97, Word 2000, Word 2002, or Word 2003)? This site is for you! If you use a later version of Word, visit our WordTips site focusing on the ribbon interface.
Visit the WordTips channel on YouTube

FREE SERVICE: Get tips like this every week in WordTips, a free productivity newsletter. Enter your address and click "Subscribe."
Copyright © 2026 Sharon Parq Associates, Inc.
Comments