Please Note: This article is written for users of the following Microsoft Word versions: 97, 2000, 2002, and 2003. If you are using a later version (Word 2007 or later), this tip may not work for you. For a version of this tip written specifically for later versions of Word, click here: Getting Pictures Out of Word.
When working with other people's documents, you may wonder if there is a way to move graphic images out of the document and into their own files. There are actually several different ways you can accomplish this.
First, if you have a graphics program on your computer, you can simply copy the files from Word to the graphics program. Follow these steps:
If you don't remember installing a graphics program on your computer, you should check to see if Microsoft Photo Editor is on your system. It has been available with several versions of Office, although it is not installed by default. If you would like to install it, you can run the Office setup program to do so, and then use the steps above.
Another approach to getting graphics out of your document is to save the document in HTML format. When you do, Word extracts the graphic images and stores them in their own JPG files. Use these steps:
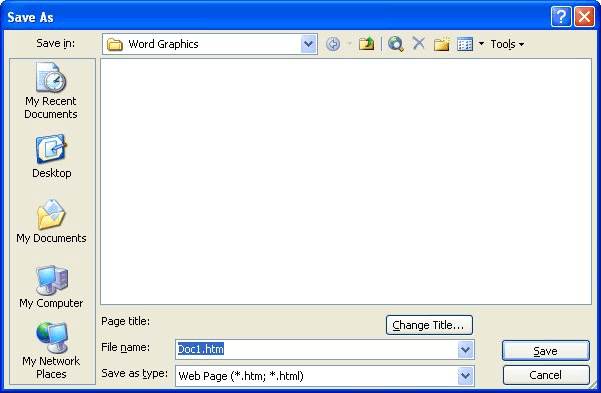
Figure 1. The Save As dialog box, ready to save a Web page.
At this point, the folder contains the HTML document and it also contains a new folder that contains all the images that were in the document. These are regular JPG files; you can open them with any graphics program. There is a drawback to using this approach, however: If you only wanted to save one of the graphics from the document, you will find that all of them have been saved in individual files, and you will need to search through them to find the one you want.
WordTips is your source for cost-effective Microsoft Word training. (Microsoft Word is the most popular word processing software in the world.) This tip (1861) applies to Microsoft Word 97, 2000, 2002, and 2003. You can find a version of this tip for the ribbon interface of Word (Word 2007 and later) here: Getting Pictures Out of Word.

Discover the Power of Microsoft Office This beginner-friendly guide reveals the expert tips and strategies you need to skyrocket your productivity and use Office 365 like a pro. Mastering software like Word, Excel, and PowerPoint is essential to be more efficient and advance your career. Simple lessons guide you through every step, providing the knowledge you need to get started. Check out Microsoft Office 365 For Beginners today!
Need to select a lot of graphics in the document? Here's an easy way to do it using tools available on the Drawing toolbar.
Discover MoreAn object anchor is used to signify the point at which an object is inserted into a document. If you want to see these ...
Discover MoreDrawing objects can be placed in a document in such a way that they overlap with each other. If you want to arrange those ...
Discover MoreFREE SERVICE: Get tips like this every week in WordTips, a free productivity newsletter. Enter your address and click "Subscribe."
There are currently no comments for this tip. (Be the first to leave your comment—just use the simple form above!)
Got a version of Word that uses the menu interface (Word 97, Word 2000, Word 2002, or Word 2003)? This site is for you! If you use a later version of Word, visit our WordTips site focusing on the ribbon interface.
Visit the WordTips channel on YouTube

FREE SERVICE: Get tips like this every week in WordTips, a free productivity newsletter. Enter your address and click "Subscribe."
Copyright © 2026 Sharon Parq Associates, Inc.
 Please Note:
This article is written for users of the following Microsoft Word versions: 97, 2000, 2002, and 2003. If you are using a later version (Word 2007 or later), this tip may not work for you. For a version of this tip written specifically for later versions of Word, click here:
Please Note:
This article is written for users of the following Microsoft Word versions: 97, 2000, 2002, and 2003. If you are using a later version (Word 2007 or later), this tip may not work for you. For a version of this tip written specifically for later versions of Word, click here:
Comments