Please Note: This article is written for users of the following Microsoft Word versions: 97, 2000, 2002, and 2003. If you are using a later version (Word 2007 or later), this tip may not work for you. For a version of this tip written specifically for later versions of Word, click here: Turning Off Spell Checking.
If you want to turn off spell checking in Word, there are two ways you can do it. Most people who want to turn it off do so because their specific documents may have many spelling errors which are not really spelling errors—you know, caused by jargon or abbreviations or highly specialized words. If you want to globally turn off spell checking for your documents, you can do so by following these steps:
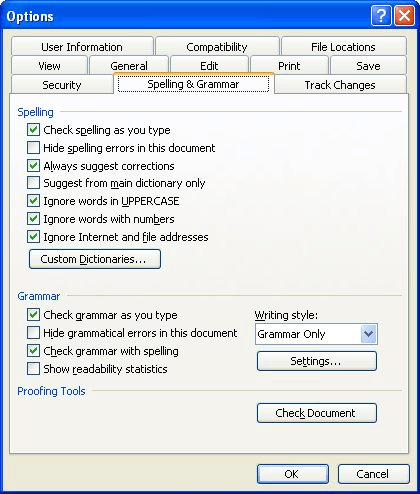
Figure 1. The Spelling & Grammar tab of the Options dialog box.
Now, in order to check the spelling of your document you will need to explicitly command Word to initiate the process. (The easiest way to do this, of course, is to press F7.)
If you want to turn off spell checking for a specific paragraph, you can do so by making sure there is no language associated with the paragraph. You do this by following these steps if you are using Word 97:
If you are using Word 2000, Word 2002, or Word 2003, the steps to follow are slightly different:
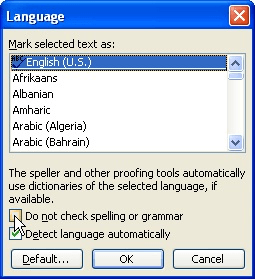
Figure 2. The Language dialog box.
At this point Word will not check the spelling or grammar of the paragraph. It will, however, check any other paragraph in your document for which proofing is not turned off. If you find yourself changing the language setting for many paragraphs in your document, you may be best to use styles to define a specific style that has proofing turned off. You can then apply that style wherever necessary in your document.
WordTips is your source for cost-effective Microsoft Word training. (Microsoft Word is the most popular word processing software in the world.) This tip (1763) applies to Microsoft Word 97, 2000, 2002, and 2003. You can find a version of this tip for the ribbon interface of Word (Word 2007 and later) here: Turning Off Spell Checking.

Create Custom Apps with VBA! Discover how to extend the capabilities of Office 365 applications with VBA programming. Written in clear terms and understandable language, the book includes systematic tutorials and contains both intermediate and advanced content for experienced VB developers. Designed to be comprehensive, the book addresses not just one Office application, but the entire Office suite. Check out Mastering VBA for Microsoft Office 365 today!
Some people feel that your writing can be better if you remove gender-specific language it may contain. Here's how you ...
Discover MoreIf you ever need to check the spelling or grammar of a document from scratch, it can be confusing knowing the proper ...
Discover MoreOne of the grammar rules you can check for in a document is the incorrect use of numbers. If you are unsure when to use ...
Discover MoreFREE SERVICE: Get tips like this every week in WordTips, a free productivity newsletter. Enter your address and click "Subscribe."
There are currently no comments for this tip. (Be the first to leave your comment—just use the simple form above!)
Got a version of Word that uses the menu interface (Word 97, Word 2000, Word 2002, or Word 2003)? This site is for you! If you use a later version of Word, visit our WordTips site focusing on the ribbon interface.
Visit the WordTips channel on YouTube

FREE SERVICE: Get tips like this every week in WordTips, a free productivity newsletter. Enter your address and click "Subscribe."
Copyright © 2026 Sharon Parq Associates, Inc.
 Please Note:
This article is written for users of the following Microsoft Word versions: 97, 2000, 2002, and 2003. If you are using a later version (Word 2007 or later), this tip may not work for you. For a version of this tip written specifically for later versions of Word, click here:
Please Note:
This article is written for users of the following Microsoft Word versions: 97, 2000, 2002, and 2003. If you are using a later version (Word 2007 or later), this tip may not work for you. For a version of this tip written specifically for later versions of Word, click here:
Comments