Have you ever tried to place clip art into your document from the Clip Art Gallery, only to have it not be visible? If you have this problem, try this solution:
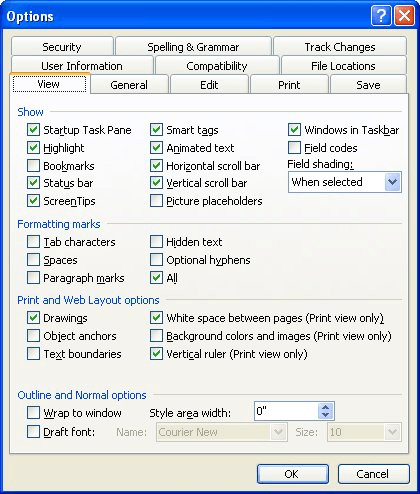
Figure 1. The View tab of the Options dialog box.
Now you should be able to place your clip art, as desired. These settings are normally cleared and selected (respectively) by default, but another user might have changed them on your system. Also, Word can change these settings automatically if it detects that screen redrawing is slow because of hardware considerations or because of the number of graphics in the document.
WordTips is your source for cost-effective Microsoft Word training. (Microsoft Word is the most popular word processing software in the world.) This tip (8514) applies to Microsoft Word 97, 2000, 2002, and 2003.

Create Custom Apps with VBA! Discover how to extend the capabilities of Office 365 applications with VBA programming. Written in clear terms and understandable language, the book includes systematic tutorials and contains both intermediate and advanced content for experienced VB developers. Designed to be comprehensive, the book addresses not just one Office application, but the entire Office suite. Check out Mastering VBA for Microsoft Office 365 today!
Nothing beats a screen shot when you are trying to convey information about using the computer. With just a couple of ...
Discover MorePictures and their titles go together like peanut butter and jelly. (Wow, did I just say that?) Seriously, pictures and ...
Discover MoreWord allows you to insert graphics in two ways: either inline or floating. If you use inline graphics, you may want to ...
Discover MoreFREE SERVICE: Get tips like this every week in WordTips, a free productivity newsletter. Enter your address and click "Subscribe."
2017-02-13 11:12:27
Kristen
You can also click on the Edit toolbar, then on "Paste Special". Make sure "picture" is highlighted and not "HTML format".
Got a version of Word that uses the menu interface (Word 97, Word 2000, Word 2002, or Word 2003)? This site is for you! If you use a later version of Word, visit our WordTips site focusing on the ribbon interface.
Visit the WordTips channel on YouTube

FREE SERVICE: Get tips like this every week in WordTips, a free productivity newsletter. Enter your address and click "Subscribe."
Copyright © 2026 Sharon Parq Associates, Inc.
Comments