Please Note: This article is written for users of the following Microsoft Word versions: 97, 2000, 2002, and 2003. If you are using a later version (Word 2007 or later), this tip may not work for you. For a version of this tip written specifically for later versions of Word, click here: AutoFormatting a Document.
Word includes a feature that formats what you type, as you type it. You probably take many of these automatic formatting (AutoFormat) adjustments for granted. Word does things like changing your quotes to Smart Quotes, automatically creating bulleted and numbered lists, and changing the indentation of paragraphs.
This is fine and good for many people, but what if you get a document from someone else and it needs a lot of the "little touches" applied to it? This is where the real industrial-strength AutoFormat feature of Word comes into play. You see, AutoFormat doesn't just work as you type—it also is available, on demand, to format an entire document. Here's how to AutoFormat your document:
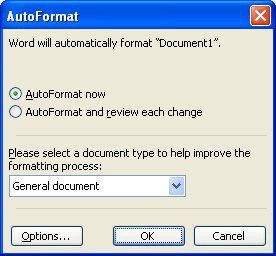
Figure 1. The AutoFormat dialog box.
At this point, AutoFormat works its magic and your document is "reformatted" to appear as it would have if you had typed it yourself.
You should understand that it is very unlikely that AutoFormat will do all the formatting you need done. Each document is different, and you should make sure you examine the document after AutoFormat is completed to see if there are any other formatting tasks you need to complete.
WordTips is your source for cost-effective Microsoft Word training. (Microsoft Word is the most popular word processing software in the world.) This tip (638) applies to Microsoft Word 97, 2000, 2002, and 2003. You can find a version of this tip for the ribbon interface of Word (Word 2007 and later) here: AutoFormatting a Document.

Discover the Power of Microsoft Office This beginner-friendly guide reveals the expert tips and strategies you need to skyrocket your productivity and use Office 365 like a pro. Mastering software like Word, Excel, and PowerPoint is essential to be more efficient and advance your career. Simple lessons guide you through every step, providing the knowledge you need to get started. Check out Microsoft Office 365 For Beginners today!
Word allows you to easily insert the contents of one document into another. Doing so, however, may result in unintended ...
Discover MoreIt's easy to apply formatting to text, but often hard (after the fact) to know exactly what was done. If you often need ...
Discover MoreSome people use quote marks around text to make it stand out. At some point you may want to treat the quoted text ...
Discover MoreFREE SERVICE: Get tips like this every week in WordTips, a free productivity newsletter. Enter your address and click "Subscribe."
There are currently no comments for this tip. (Be the first to leave your comment—just use the simple form above!)
Got a version of Word that uses the menu interface (Word 97, Word 2000, Word 2002, or Word 2003)? This site is for you! If you use a later version of Word, visit our WordTips site focusing on the ribbon interface.
Visit the WordTips channel on YouTube

FREE SERVICE: Get tips like this every week in WordTips, a free productivity newsletter. Enter your address and click "Subscribe."
Copyright © 2026 Sharon Parq Associates, Inc.
 Please Note:
This article is written for users of the following Microsoft Word versions: 97, 2000, 2002, and 2003. If you are using a later version (Word 2007 or later), this tip may not work for you. For a version of this tip written specifically for later versions of Word, click here:
Please Note:
This article is written for users of the following Microsoft Word versions: 97, 2000, 2002, and 2003. If you are using a later version (Word 2007 or later), this tip may not work for you. For a version of this tip written specifically for later versions of Word, click here:
Comments