Subscriber Josh Ginn wrote about a problem that recently cropped up with his printouts. It seems that he's started getting what he describes as "corner lines" on his documents, where the margins get set.
At first glance, this could be a case of having text boundaries turned on. This is a setting in Word that displays a dotted line around margins, columns, and paragraphs. You can turn text boundaries on and off in this manner:
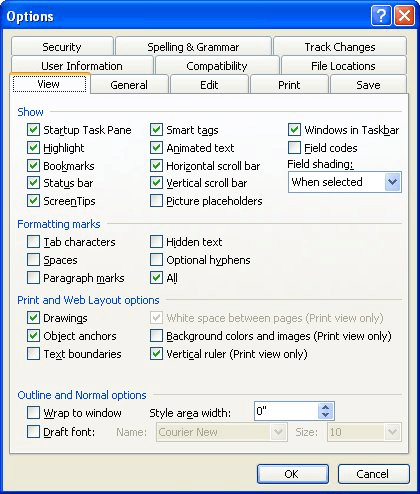
Figure 1. The View tab of the Options dialog box.
With that being said, the problem in Josh's case probably isn't related to text boundaries, because he describes his problem as being on printouts. (Text boundaries are only displayed on the screen; they don't appear on printouts.) This means that the problem must be related to the printer driver.
The "corner lines" mentioned by Josh sound like what typographers refer to as crop marks. They appear at the corners of printouts as a guide to indicate the point at which a page should be cropped, or cut. Word doesn't include the capability to print crop marks, but some printers can print them--particularly if the printer handles oversized paper.
If there has been a recent update in your printer driver, or if there has been a new printer installed on your system, the appearance of the crop marks is probably related to that change. Different printer drivers provide different functionality, so you will need to check the settings in the printer driver to see if you can discover a setting that controls the crop marks. To get to the printer driver settings, follow these steps:
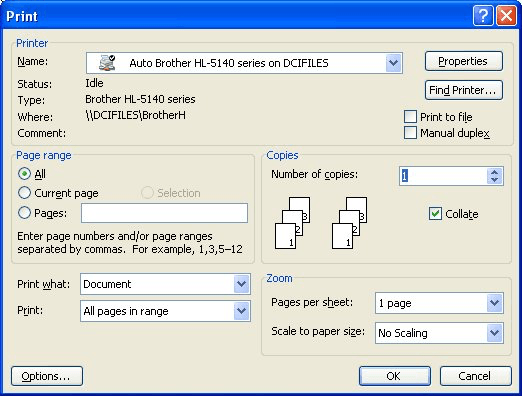
Figure 2. The Print dialog box.
There is one other thing to check out if you are using Word 2002 or Word 2003. The unwanted marks could be due to the languages specified in Word. Microsoft describes this problem (and solution) in this Knowledge Base article:
http://support.microsoft.com/kb/839371
The short answer is that you can remove the unwanted marks by disabling support for Asian languages, such as Chinese, Japanese, or Korean.
WordTips is your source for cost-effective Microsoft Word training. (Microsoft Word is the most popular word processing software in the world.) This tip (145) applies to Microsoft Word 97, 2000, 2002, and 2003.

Create Custom Apps with VBA! Discover how to extend the capabilities of Office 365 applications with VBA programming. Written in clear terms and understandable language, the book includes systematic tutorials and contains both intermediate and advanced content for experienced VB developers. Designed to be comprehensive, the book addresses not just one Office application, but the entire Office suite. Check out Mastering VBA for Microsoft Office 365 today!
Plan on using printed letterhead in your laser printer? Here are some tips and cautions about doing so.
Discover MoreWant to print just the current page? Word can do it, if you know how.
Discover MoreBy default, Word automatically changes the "Print What" setting in the Print dialog box to reflect what it thinks should ...
Discover MoreFREE SERVICE: Get tips like this every week in WordTips, a free productivity newsletter. Enter your address and click "Subscribe."
There are currently no comments for this tip. (Be the first to leave your comment—just use the simple form above!)
Got a version of Word that uses the menu interface (Word 97, Word 2000, Word 2002, or Word 2003)? This site is for you! If you use a later version of Word, visit our WordTips site focusing on the ribbon interface.
Visit the WordTips channel on YouTube

FREE SERVICE: Get tips like this every week in WordTips, a free productivity newsletter. Enter your address and click "Subscribe."
Copyright © 2026 Sharon Parq Associates, Inc.
Comments