Please Note: This article is written for users of the following Microsoft Word versions: 97, 2000, 2002, and 2003. If you are using a later version (Word 2007 or later), this tip may not work for you. For a version of this tip written specifically for later versions of Word, click here: Changing Defaults for Text Boxes and Callouts.
Word allows you to easily add text boxes and callouts to your documents. These can be used for a variety of purposes, and you can format the text box or callout to appear just about any way you desire. Word refers to text boxes and callouts, collectively, as AutoShapes. If you find yourself making a lot of similar changes to AutoShapes, you can set the default values of them in the following manner:
Now, the next time you insert an AutoShape, it will retain many of the same default settings that you defined in step 1. It won't retain them all, however. Word remembers things like line weight, line type, and color, but it does not remember things like text attributes within the text box or the direction and length of callout tails.
There are several ways around this problem, however. If you are using the exact same AutoShape multiple times in the same document, simply select the one that is formatted as you want, hold down the Ctrl key, and drag the AutoShape to a new location. By holding down the Ctrl key you inform Word that you want to copy the AutoShape rather than move it.
A more versatile solution is to simply define your AutoShape as an AutoText entry. Follow these steps:
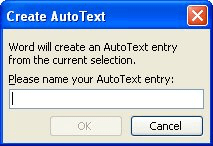
Figure 1. The Create AutoText dialog box.
Later, when you want to use the AutoText entry, simply type the name of the entry (the one you provided in step 4) and then press F3. In the case being discussed here, the AutoShape, complete with all formatting settings, is inserted in your document.
WordTips is your source for cost-effective Microsoft Word training. (Microsoft Word is the most popular word processing software in the world.) This tip (1561) applies to Microsoft Word 97, 2000, 2002, and 2003. You can find a version of this tip for the ribbon interface of Word (Word 2007 and later) here: Changing Defaults for Text Boxes and Callouts.

The First and Last Word on Word! Bestselling For Dummies author Dan Gookin puts his usual fun and friendly candor back to work to show you how to navigate Word 2019. Spend more time working and less time trying to figure it all out! Check out Word 2019 For Dummies today!
Word allows you to easily insert pictures into your documents. Getting the pictures back out of your documents can be ...
Discover MoreWord allows you to insert graphics in two ways: either inline or floating. If you use inline graphics, you may want to ...
Discover MoreAn Access database can store all types of data, including graphic images. Merging most data from Access into Word is ...
Discover MoreFREE SERVICE: Get tips like this every week in WordTips, a free productivity newsletter. Enter your address and click "Subscribe."
2020-06-16 15:23:16
Bob Marsh
Great Word Tips! There are so many things Word has to offer that many of us may not have even known existed, and if we did, we just didn't have the time to try them. Word Tips provides that incentive to explore Word because their tips are right there in front of you - on the screen. With the easy instructions, I always seem to find enough time to try a couple new tips, which ultimately helps me to find ways to increase my proficiency in Word, thereby giving me more time to try additional Word Tips!
Got a version of Word that uses the menu interface (Word 97, Word 2000, Word 2002, or Word 2003)? This site is for you! If you use a later version of Word, visit our WordTips site focusing on the ribbon interface.
Visit the WordTips channel on YouTube

FREE SERVICE: Get tips like this every week in WordTips, a free productivity newsletter. Enter your address and click "Subscribe."
Copyright © 2026 Sharon Parq Associates, Inc.
 Please Note:
This article is written for users of the following Microsoft Word versions: 97, 2000, 2002, and 2003. If you are using a later version (Word 2007 or later), this tip may not work for you. For a version of this tip written specifically for later versions of Word, click here:
Please Note:
This article is written for users of the following Microsoft Word versions: 97, 2000, 2002, and 2003. If you are using a later version (Word 2007 or later), this tip may not work for you. For a version of this tip written specifically for later versions of Word, click here:
Comments