Please Note: This article is written for users of the following Microsoft Word versions: 97, 2000, 2002, and 2003. If you are using a later version (Word 2007 or later), this tip may not work for you. For a version of this tip written specifically for later versions of Word, click here: Printing Portions of Mail Merged Documents.
When you use the mail merge feature of Word, you have the capability to either merge to the printer or to merge to a new document. Choosing the latter is often the best alternative, since you have the ability to inspect your output before actually printing.
What happens if you need to only print a portion of your merged documents, however? For instance, if your merged document takes 320 pages, and you only need to print the last 15 of them? You might think the answer to print only a range of pages, meaning pages 305-320.
If you try to do this with a mail-merged document, you will not get an expected result. In fact, you will get no result at all. This is because Word inserts a section break between each merged record it adds to your document. Thus, if you are printing 320 copies of a single-paged document, you have 320 page ones, not pages 1 through 320.
Sound confusing? It can be if you don't understand how sections work. Every time a new section is started, Word starts counting page numbers over again. To get around this problem, you have three alternatives. First, you can simply start deleting pages until you only have your desired pages remaining. (I call this the brute force method, and it is not always the best choice.) Second, you can simply replace all the section breaks in the merged document with line breaks. This is done by following these steps:
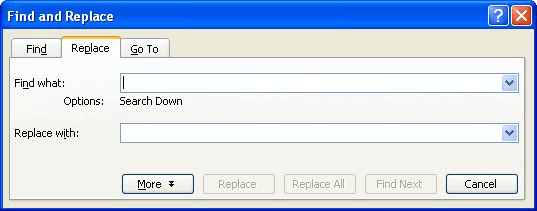
Figure 1. The Replace tab of the Find and Replace dialog box.
Now you can print as normal, entering a range of page numbers you want to print.
The third solution is perhaps the fastest and easiest, however. Simply remember that in your merged document you are working with sections, instead of pages. Thus, if you want to print out the form letter for records 305 through 320, you would follow these steps:
WordTips is your source for cost-effective Microsoft Word training. (Microsoft Word is the most popular word processing software in the world.) This tip (1126) applies to Microsoft Word 97, 2000, 2002, and 2003. You can find a version of this tip for the ribbon interface of Word (Word 2007 and later) here: Printing Portions of Mail Merged Documents.

Learning Made Easy! Quickly teach yourself how to format, publish, and share your content using Word 2021 or Microsoft 365. With Step by Step, you set the pace, building and practicing the skills you need, just when you need them! Check out Microsoft Word Step by Step today!
When you are merging data from an Access database, you may get more information than you want, especially when it comes ...
Discover MoreWhen merging data into a Word document, you may want to add information to the document based on an evaluation of what is ...
Discover MoreWhen creating a mail merge document, you use merge fields to indicate where the information from each record of your data ...
Discover MoreFREE SERVICE: Get tips like this every week in WordTips, a free productivity newsletter. Enter your address and click "Subscribe."
There are currently no comments for this tip. (Be the first to leave your comment—just use the simple form above!)
Got a version of Word that uses the menu interface (Word 97, Word 2000, Word 2002, or Word 2003)? This site is for you! If you use a later version of Word, visit our WordTips site focusing on the ribbon interface.
Visit the WordTips channel on YouTube

FREE SERVICE: Get tips like this every week in WordTips, a free productivity newsletter. Enter your address and click "Subscribe."
Copyright © 2026 Sharon Parq Associates, Inc.
 Please Note:
This article is written for users of the following Microsoft Word versions: 97, 2000, 2002, and 2003. If you are using a later version (Word 2007 or later), this tip may not work for you. For a version of this tip written specifically for later versions of Word, click here:
Please Note:
This article is written for users of the following Microsoft Word versions: 97, 2000, 2002, and 2003. If you are using a later version (Word 2007 or later), this tip may not work for you. For a version of this tip written specifically for later versions of Word, click here:
Comments