Please Note: This article is written for users of the following Microsoft Word versions: 97, 2000, 2002, and 2003. If you are using a later version (Word 2007 or later), this tip may not work for you. For a version of this tip written specifically for later versions of Word, click here: Adding Automatic Lines.
Written by Allen Wyatt (last updated April 16, 2022)
This tip applies to Word 97, 2000, 2002, and 2003
Word includes a sometimes-helpful little feature that allows you to add lines in your documents, without removing your fingers from the keyboard. All you need to do is start at the left margin of a new line, type at least three characters, and then press Enter. The result is a line based on the characters you typed. You can use the following characters:
You can actually type more than three of each character, if you desire. Word doesn't care that much—the only requirement is that there is at least three of them, and they begin at the left margin. What Word does is to add a border of the specified type to the bottom of the paragraph. If you want to later delete the line, the only way to do so is to remove the paragraph, or choose Borders and Shading from the Format menu.
If you can't automatically add lines on your system, follow these steps:
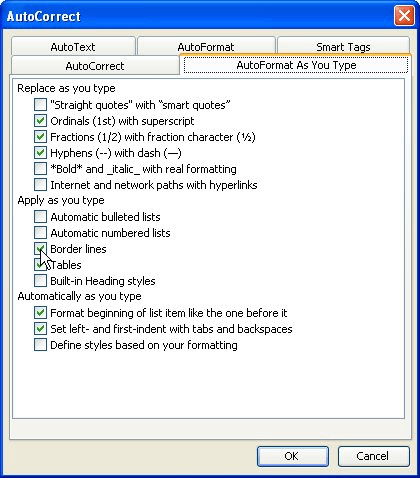
Figure 1. The AutoFormat As You Type tab of the AutoCorrect Options dialog box.
WordTips is your source for cost-effective Microsoft Word training. (Microsoft Word is the most popular word processing software in the world.) This tip (622) applies to Microsoft Word 97, 2000, 2002, and 2003. You can find a version of this tip for the ribbon interface of Word (Word 2007 and later) here: Adding Automatic Lines.

Do More in Less Time! Are you ready to harness the full power of Word 2013 to create professional documents? In this comprehensive guide you'll learn the skills and techniques for efficiently building the documents you need for your professional and your personal life. Check out Word 2013 In Depth today!
Line spacing is used to control how close lines are to each other within a paragraph. Word allows you to specify several ...
Discover MoreIf the line spacing in a paragraph appears uneven it may result of the combination of a larger character or object pasted ...
Discover MorePress a tab at the beginning of a paragraph, and Word normally assumes you want to indent the paragraph. If you don't ...
Discover MoreFREE SERVICE: Get tips like this every week in WordTips, a free productivity newsletter. Enter your address and click "Subscribe."
There are currently no comments for this tip. (Be the first to leave your comment—just use the simple form above!)
Got a version of Word that uses the menu interface (Word 97, Word 2000, Word 2002, or Word 2003)? This site is for you! If you use a later version of Word, visit our WordTips site focusing on the ribbon interface.
Visit the WordTips channel on YouTube

FREE SERVICE: Get tips like this every week in WordTips, a free productivity newsletter. Enter your address and click "Subscribe."
Copyright © 2024 Sharon Parq Associates, Inc.
 Please Note:
This article is written for users of the following Microsoft Word versions: 97, 2000, 2002, and 2003. If you are using a later version (Word 2007 or later), this tip may not work for you. For a version of this tip written specifically for later versions of Word, click here:
Please Note:
This article is written for users of the following Microsoft Word versions: 97, 2000, 2002, and 2003. If you are using a later version (Word 2007 or later), this tip may not work for you. For a version of this tip written specifically for later versions of Word, click here:
Comments