Please Note: This article is written for users of the following Microsoft Word versions: 97, 2000, 2002, and 2003. If you are using a later version (Word 2007 or later), this tip may not work for you. For a version of this tip written specifically for later versions of Word, click here: Adding Phrases to the Grammar Checker.
Written by Allen Wyatt (last updated September 9, 2019)
This tip applies to Word 97, 2000, 2002, and 2003
Sheryl wonders if it is possible to add commonly used phrases to the grammar check so that they are not flagged as errors. Word flags them as either "wordy" or using too many nouns or verbs in a row, but her job requires documents with these phrases. Sheryl notes that the solution may be to turn off the grammar check, which she'd rather not do (even though Word is not exactly the arbiter of good grammar).
There is not really a good way to do this in Word. You could, if desired, modify the grammar options to exclude some of the individual settings so that some of the items aren't checked by the grammar checker. You can do this by following these steps:
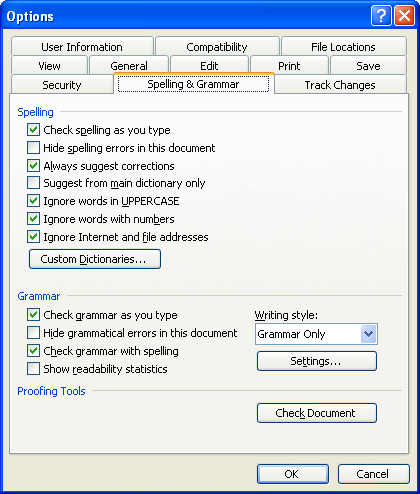
Figure 1. The Spelling & Grammar tab of the Options dialog box.
For the issues described by Sheryl, you'll want to pay particular attention to the following options in step 4:
Disabling all or a combination of these options may resolve the problem. If it doesn't, then the best solution is to follow these general steps:
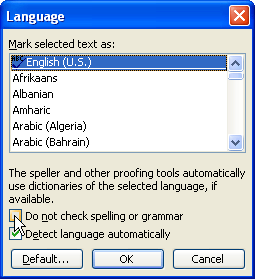
Figure 2. The Language dialog box.
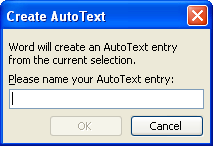
Figure 3. The Create AutoText dialog box.
Now you can insert the AutoText entries in your document, as needed, and they won't be checked by the grammar checker. This is a bit more work than disabling a few grammar options, but it has the added benefit of providing a standardized way of making sure your spelling and capitalization is always correct on those phrases.
WordTips is your source for cost-effective Microsoft Word training. (Microsoft Word is the most popular word processing software in the world.) This tip (7600) applies to Microsoft Word 97, 2000, 2002, and 2003. You can find a version of this tip for the ribbon interface of Word (Word 2007 and later) here: Adding Phrases to the Grammar Checker.

Do More in Less Time! Are you ready to harness the full power of Word 2013 to create professional documents? In this comprehensive guide you'll learn the skills and techniques for efficiently building the documents you need for your professional and your personal life. Check out Word 2013 In Depth today!
Want to correct the spelling of a word that Word thinks is improperly spelled? A quick way to do it is to right-click the ...
Discover MoreWhen you perform a spelling check, Word typically checks everything in your document. If you want to limit what is ...
Discover MoreThe Find and Replace feature of Word is very powerful, allowing you to finely target exactly what you want to search. ...
Discover MoreFREE SERVICE: Get tips like this every week in WordTips, a free productivity newsletter. Enter your address and click "Subscribe."
There are currently no comments for this tip. (Be the first to leave your comment—just use the simple form above!)
Got a version of Word that uses the menu interface (Word 97, Word 2000, Word 2002, or Word 2003)? This site is for you! If you use a later version of Word, visit our WordTips site focusing on the ribbon interface.
Visit the WordTips channel on YouTube

FREE SERVICE: Get tips like this every week in WordTips, a free productivity newsletter. Enter your address and click "Subscribe."
Copyright © 2024 Sharon Parq Associates, Inc.
 Please Note:
This article is written for users of the following Microsoft Word versions: 97, 2000, 2002, and 2003. If you are using a later version (Word 2007 or later), this tip may not work for you. For a version of this tip written specifically for later versions of Word, click here:
Please Note:
This article is written for users of the following Microsoft Word versions: 97, 2000, 2002, and 2003. If you are using a later version (Word 2007 or later), this tip may not work for you. For a version of this tip written specifically for later versions of Word, click here:
Comments