Please Note: This article is written for users of the following Microsoft Word versions: 97, 2000, 2002, and 2003. If you are using a later version (Word 2007 or later), this tip may not work for you. For a version of this tip written specifically for later versions of Word, click here: Printing without Headings.
Written by Allen Wyatt (last updated January 8, 2021)
This tip applies to Word 97, 2000, 2002, and 2003
Lyle uses Word to create essays by putting together an outline and then developing the body of the essay based on the outline. When he is finished with the essay, the outline is important to him, but he does not consider it a part of the essay. He is wondering how he can print the essay without the outline, which consists of the various headings in the document.
There are a couple of ways that you can print your essay without the headings. One way is to simply delete the headings on the copy you want to print. This is relatively easy for a short document with few headings, and only mildly more complicated if you have a longer document with many headings. (In which case you can use Find and Replace to delete the headings.) When through printing, simply close the document without saving, and your on-disk version (the last one you saved) still has the headings in place.
Another option is to format the headings so that they are white. White text printed on white paper means that they will be invisible on the printed page, but there will still be vertical space left in the document to indicate where the headings really are.
The best solution, by far, is to use the Hidden attribute for your headings. Just select the headings (or display the style definition for your headings) and choose Font from the Format menu. Word displays the Font dialog box and you can select the Hidden check box. When you close the dialog box, the attribute is applied to the headings.
With the Hidden attribute set, there are two ways you can instruct Word to treat the text: You can control whether hidden text is displayed on-screen, and you can control whether it is printed. These settings are separate from each other, and in this case you probably want the headings to be visible on-screen, but invisible when printing. Follow these steps:
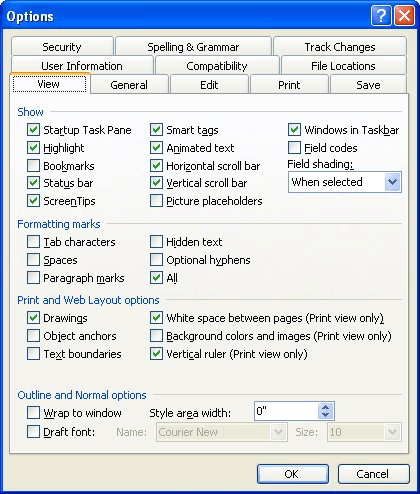
Figure 1. The View tab of the Options dialog box.
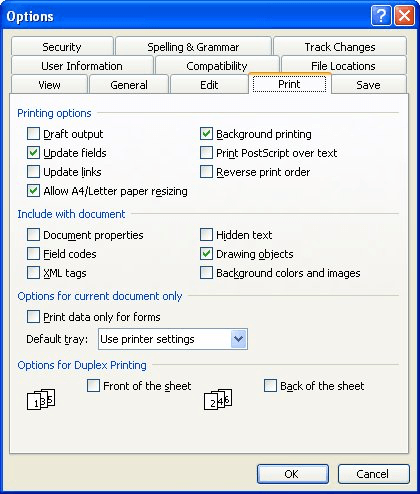
Figure 2. The Print tab of the Options dialog box.
WordTips is your source for cost-effective Microsoft Word training. (Microsoft Word is the most popular word processing software in the world.) This tip (295) applies to Microsoft Word 97, 2000, 2002, and 2003. You can find a version of this tip for the ribbon interface of Word (Word 2007 and later) here: Printing without Headings.

Do More in Less Time! Are you ready to harness the full power of Word 2013 to create professional documents? In this comprehensive guide you'll learn the skills and techniques for efficiently building the documents you need for your professional and your personal life. Check out Word 2013 In Depth today!
You may want to use a macro to process and then print your document. Part of that printing may involve specifying which ...
Discover MoreHave you ever printed a document, only to see that the page numbers are incorrect on the printout? If so, it could be due ...
Discover MoreWhen working with printed documents, many people prefer to see the document double-spaced. If you have a single-spaced ...
Discover MoreFREE SERVICE: Get tips like this every week in WordTips, a free productivity newsletter. Enter your address and click "Subscribe."
There are currently no comments for this tip. (Be the first to leave your comment—just use the simple form above!)
Got a version of Word that uses the menu interface (Word 97, Word 2000, Word 2002, or Word 2003)? This site is for you! If you use a later version of Word, visit our WordTips site focusing on the ribbon interface.
Visit the WordTips channel on YouTube

FREE SERVICE: Get tips like this every week in WordTips, a free productivity newsletter. Enter your address and click "Subscribe."
Copyright © 2024 Sharon Parq Associates, Inc.
 Please Note:
This article is written for users of the following Microsoft Word versions: 97, 2000, 2002, and 2003. If you are using a later version (Word 2007 or later), this tip may not work for you. For a version of this tip written specifically for later versions of Word, click here:
Please Note:
This article is written for users of the following Microsoft Word versions: 97, 2000, 2002, and 2003. If you are using a later version (Word 2007 or later), this tip may not work for you. For a version of this tip written specifically for later versions of Word, click here:
Comments